Table of Contents
Interface
Hover over “New” in the top admin bar to view the dropdown and create a new post or page.

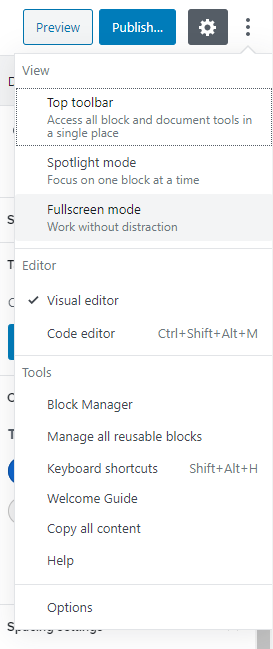
If your left sidebar disappears when editing a new page, click on the More Tools and Options menu (three dots on the right side of the top toolbar) and toggle off ‘Fullscreen mode’ by clicking on it.
Navigation Menu
To add a menu item that links externally, you will need to enable a hidden setting that displays the “open in new window” toggle. See Demo Video.
Page Setup Tips
Page Permalink Setup
When building a new page, add the Page Title and click Save Draft in the upper right corner next to the “Preview” and “Publish” buttons.

This will force the Permalinks section to appear within the Document Settings (right sidebar), so you can edit the page slug. You only need include page slug in Permalinks section, not the full URL.
Further down the Document Settings, you will see Page Attributes. Here is where you will set the Parent Page.
- Setting this here will automatically update the Page URL.
- To QA, once you’ve set the parent page, look at the “View Page” URL in the Permalinks section to make sure full URL is correct.
Cloning a Page

In the left sidebar, click on Pages to access the all pages list. Hover over the page you want to clone and click on the “Copy” link. You now have a cloned page!
Working with Blocks
Manipulating Blocks

There are two ways to move blocks:
Use the corresponding arrows on the left hand side of the block when the block is in focus (shown above) to move it up or down.
OR
Click and hold on the button with the 6 dots between the arrow buttons (shown above) and drag the block to the desired location.
- When using this drag method, you can also nest a block within another block. (ie. dragging a column builder block within a section block).
- A blue line will appear while you are dragging your block around that denotes where your block would be placed/nested if you let go of the block there.
Removing Blocks
Sometimes empty blocks can appear while you are building your page. These empty blocks can add unwanted spacing and padding to your page.
- To remove an empty block, type text within the block – this will automatically turn it a paragraph block.
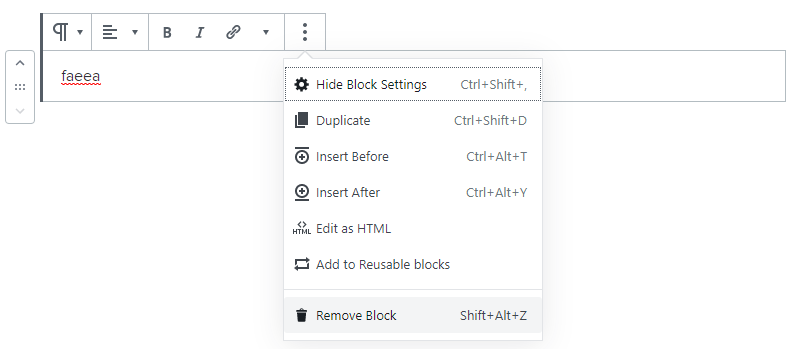
- Hover over the block to reveal the block editing toolbar.
- Click on the 3 vertical dots and choose the “Remove Block” option.
Reusable Blocks
[your site here]/wp-admin/edit.php?post_type=wp_block will bring up a list of all reusable blocks, which allows you to edit them without having to do it from within a page.
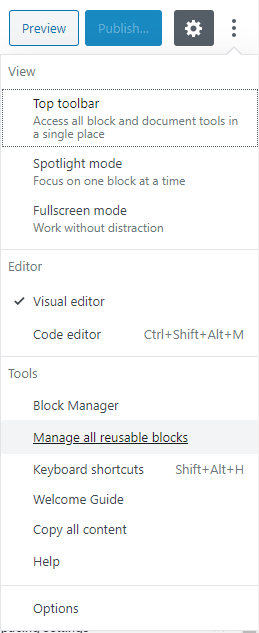
You may also access the reusable block list by clicking on the More Tools and Options menu (three dots on the right side of the top toolbar) and choosing “Manage all reusable blocks.”
Block Navigation

The block navigation is a useful feature on WordPress that gives you a top level overview of all the blocks that are currently being used on a page.
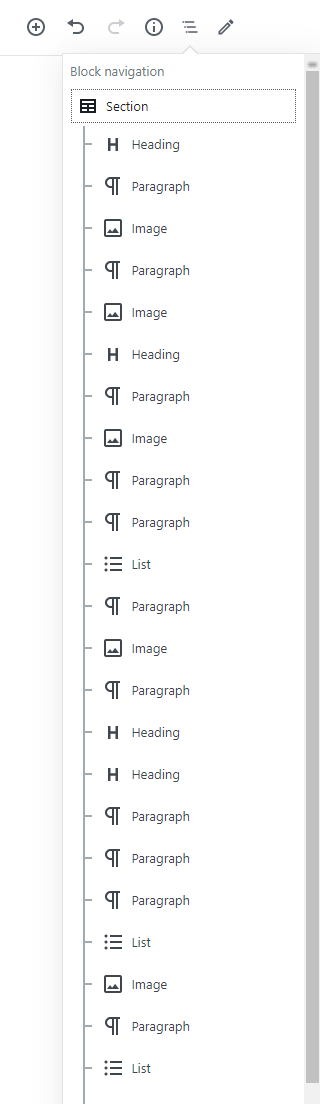
To do this, click within the block editor so that the body of the page is selected and click on the block navigation on the top toolbar. With the block selected, you can quickly delete blocks by pressing “delete” on your keyboard this way.
Note: Clicking on a specific block within the block navigation will automatically scroll to that particular block within the editor.
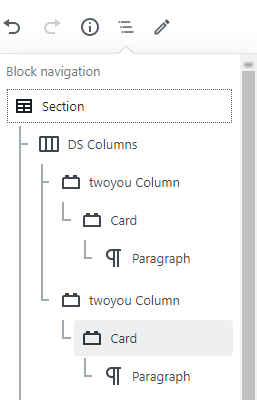
Block navigation also provides a more granular view – users can quickly look and select blocks that are nested within each other (ie. section > column > card as shown in the example above) that would otherwise be difficult to select within the editor.
To do this, click on a block on the block navigation. This will expand that block to show its nested blocks, if there are any.
Note: The most accurate way to ensure that you are getting the correct settings in the right panel for each block type, select the block you are trying to edit within the block navigation.
Specific Blocks
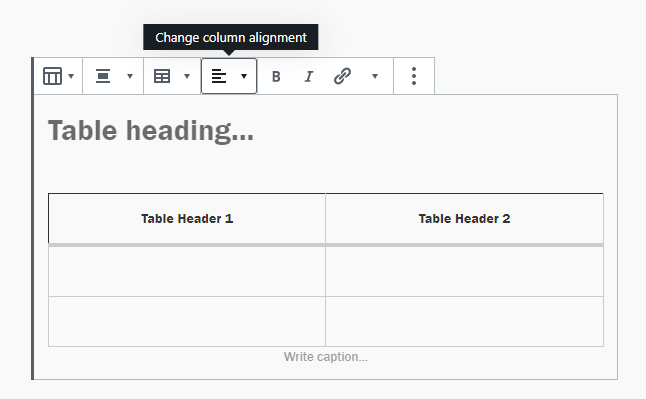
Table Block
To center the table headers, click on the header and select “Align Column Left”. It will look like it is set to that already, but press it again and you will see the alignment change.
Section Block
When adding a background image, use the min-height setting to increase the height of the section rather than applying a bunch of margin and padding to the contents.
Sections do not need to be used on interior pages with sidebars because there are automatically gutters added for you
Set Widths
- Narrow – 960px, equivalent to container–lg
- Normal – 1152px, equivalent to container
- Wide – 1960px, super wide option to contain everything on larger monitors
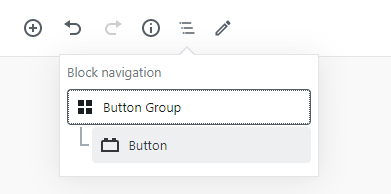
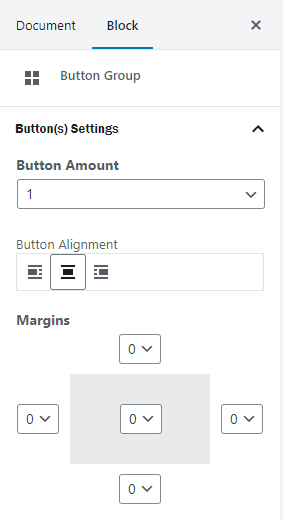
Button Block
To center a button, use the button alignment setting. You can find this setting within the button group block settings.
Use the block navigation to make sure that the “button group block” is focused so that it shows the button alignment settings in the right sidebar.
Card Block
For more control over padding inside the card, toggle on the “Title has individual padding” option in the Title settings.
Linking
Internal Links
When copy/pasting from Cask, click on the link to remove link. Type the internal page name that you are linking to. This will make the link work on the WordPress site and not link back to the Cask site.
Changing Link Color
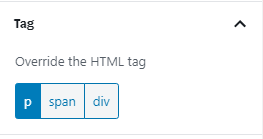
Make sure the paragraph tag is set to a p and not span or div and make sure to select your color.
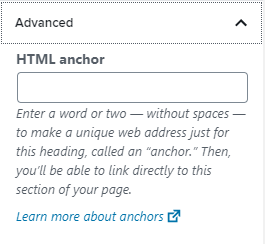
Anchor Links
You can easily add anchor links to header blocks. Scroll down in the block settings to Advanced section and insert your anchor link (do not include the #) in the HTML anchor input field.
Linking Copy Text to an Inline Lead Form
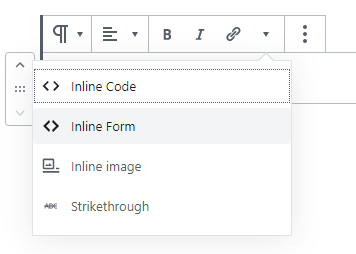
To link copy to an inline lead form, highlight the copy that you want linked (this can be done on a specific portion of the copy within a paragraph block) and click on the dropdown arrow next to the hyperlink button. Choose Inline Form.
Phone Number Links
To link out a phone number, use a tel link when inputting the URL.
ie. tel:123-456-7890
Set it to open in new tab and you’re set! WordPress automatically adds the aria-label of “Phone number:” so manually adding screen reader text isn’t necessary.
Final result: 1-844-768-4637
Hide Pages from Navigation
Found in the Document Settings in the right sidebar, navigate to the “Tags” section.
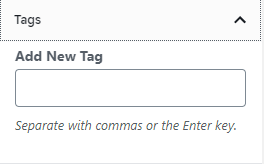
Add the following “tags” to hide from navigation:
- Leadership/Faculty: ‘leadership-and-faculty-‘
- Course Pages: ‘courses’
- Student Profiles: ‘student’
- Alumni Profiles: ‘alumni’
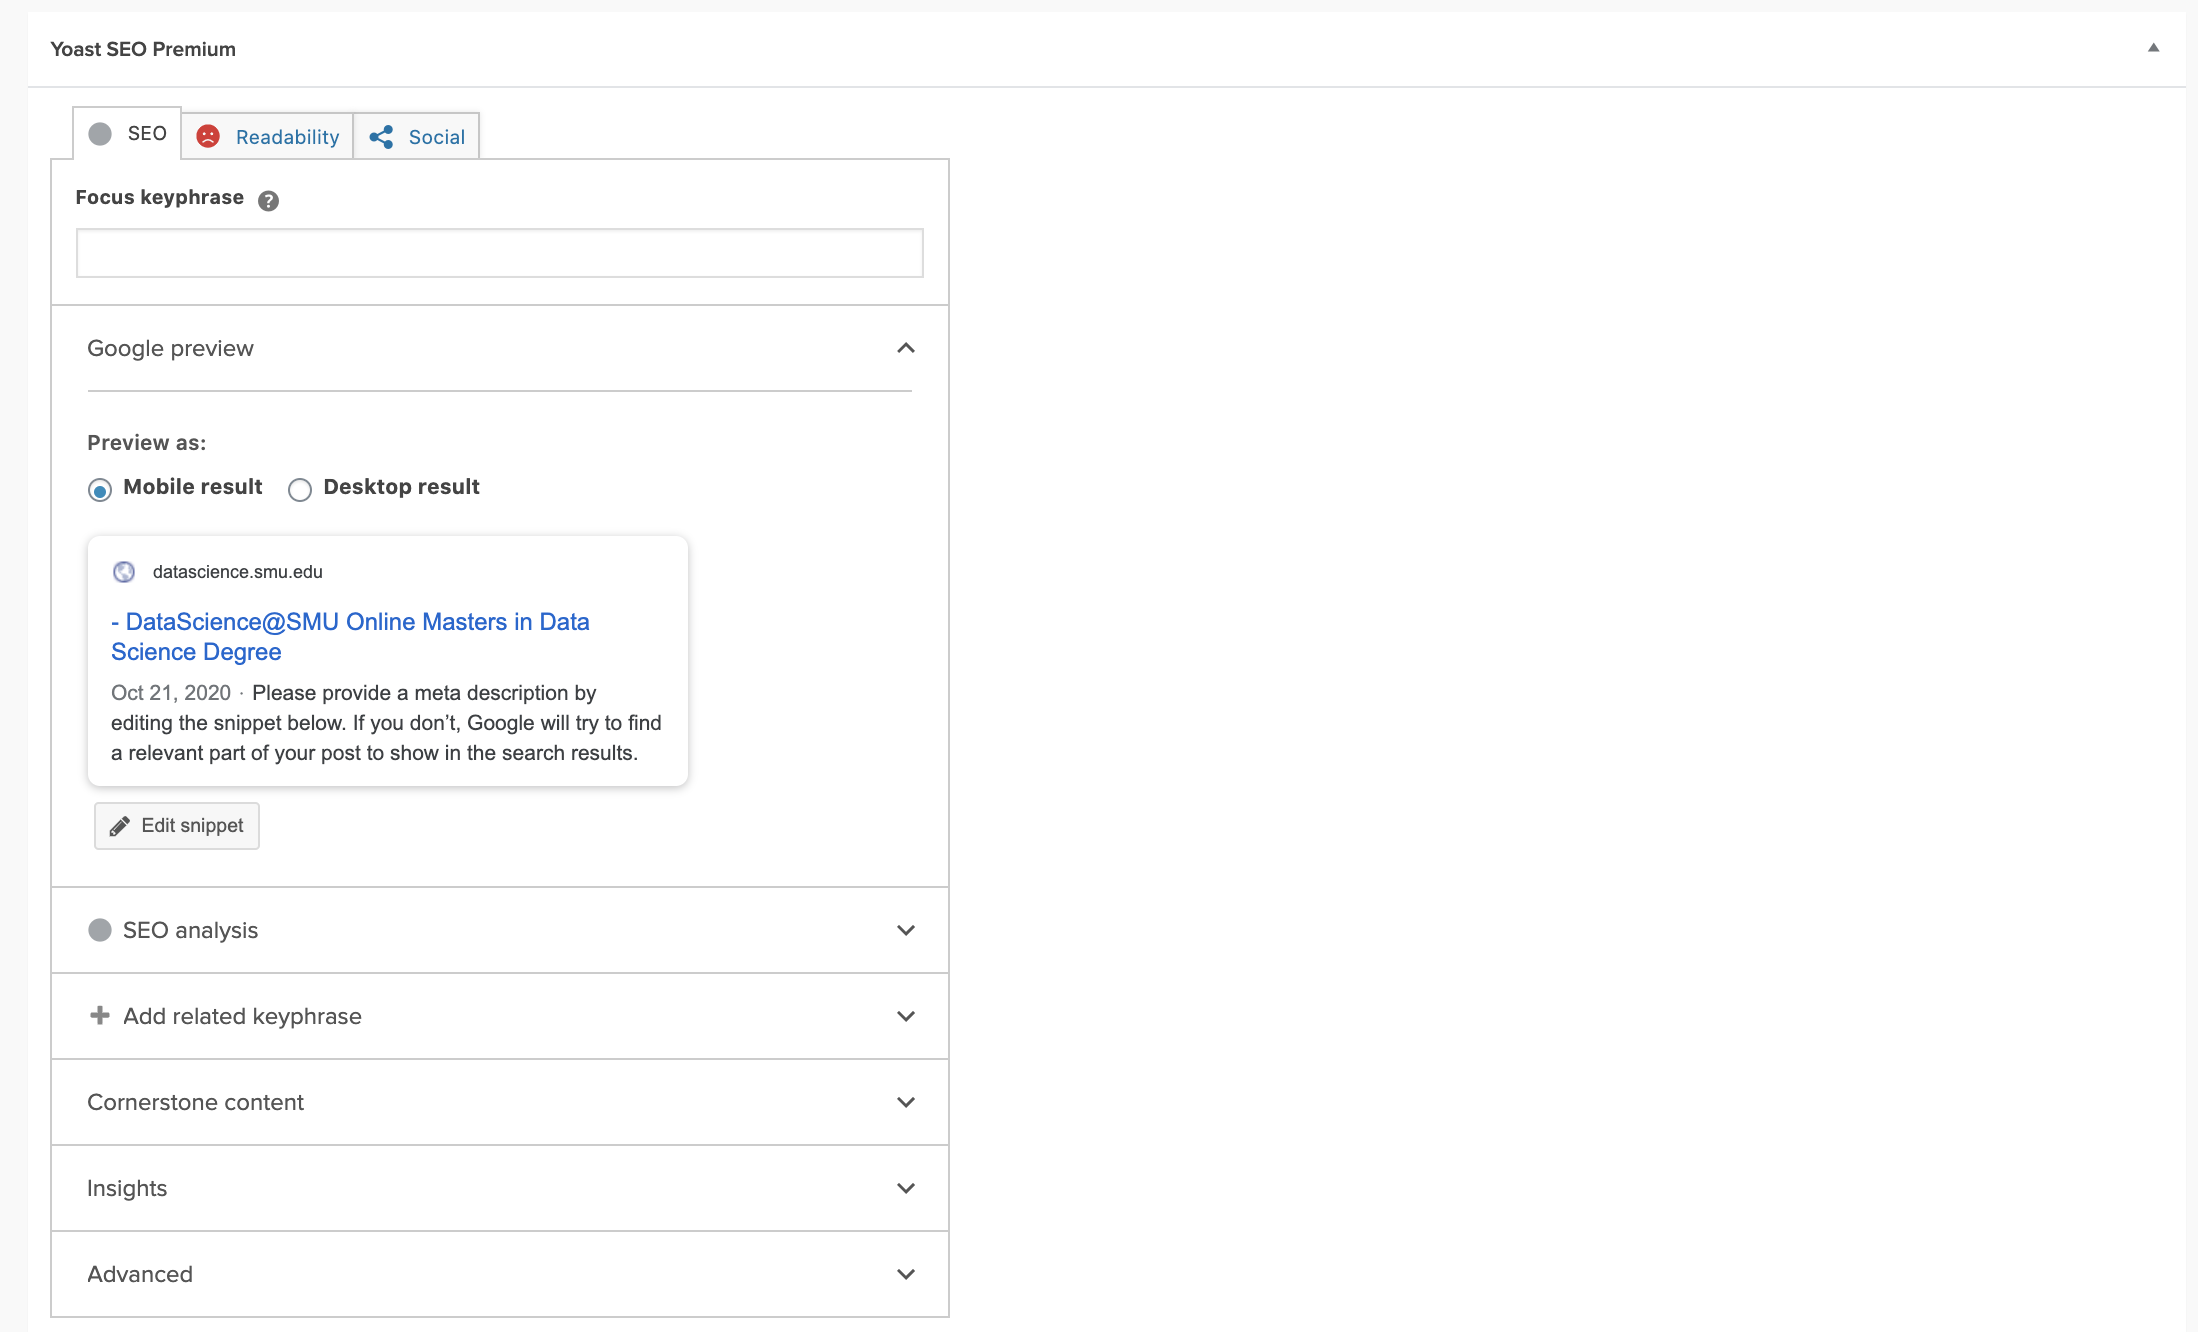
Yoast SEO Page Settings
The Yoast SEO settings can be found at the bottom of each page:
No Index / No Follow
Click on the “Advanced” section and change the following settings:
- “Allow search engines to show this Page in search results?” No
- “Should search engines follow links on this page?” No
Changing Default Breadcrumbs Title
If your breadcrumb title is different from the page title, you can override it in the “Advanced” setting as well.
Scroll to “Breadcrumbs Title” and paste the title to override.
Yoast’s Automatic Redirects
If you update a URL on a published page, Yoast will automatically create a redirect and inform you with a popup after you change a page’s URL and save. You can click on the red “Undo” link to undo the automatically created redirect.
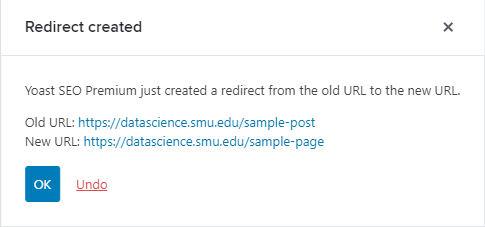
Note: If a site is not live yet and you just needed to alter the URL, the redirect is not necessary and you can undo the automatic redirect.
Steps for Faculty
Linking Within the Site
New page per profile – do this before creating the grid page
- Leadership faculty parent page
- Leadership-faculty-tag
- Featured image
- Excerpt = title
Grid page
- Dynamic block
- Selection mode
- Type = Page
- Select profile
- Choose in the order you want to show**
- 3 desktop
- 1 mobile
- Content title = h5
- Content size = 12px
- Formatting will carry through each one
Linking Externally
TBD
Form Page: H1 + LF + Content on Mobile
Example: https://ot.steinhardt.nyu.edu/form-2/
- Add a section – normal
- Add a header (h1) – full width
- Add a DS Column 6-6 – stack on mobile
- Check off “reverse on mobile”
- Left column content
- Right column form
- No index, no follow, hidden from sitemap, no breadcrumbs
Manually Adding Footnotes
You will need to edit as HTML to add footnotes for now. Click the three dots and “edit as HTML.” After making the changes you can click the dots again and “edit visually”
Footnote should follow this format:
Footnote reference should follow this format:
Final Results:
1 your footnote here arrow_upwardReturn to footnote referenceWhitelabel Updates:
When working on WordPress and you notice you need to have Whitelabel updates made:
1. Create a ticket for creative to fill out Whitelabel staging
a. Once activated, check cask sandbox
b. This step allows us to ensure cask production will look ok with any new changes
c. Sample ticket for creative: https://jira.2u.com/browse/MKTGWEB-45136
2. If all changes look ok, have creative push changes live to Whitelabel production
3. Once actived in Whitelabel production, re-import and save in WordPress Whitelabel settings
Keyboard Shortcuts:
- Move onto next line within same block: Shift + enter
- Delete a bock: Block Navigation > select block > backspace