Mega Menu
Creating a Mega Menu
In order to create a Mega Menu, you first need to ensure the Mega Menu plugin is enabled on the site.
To enable the Mega Menu go to options > settings > Mega Menu
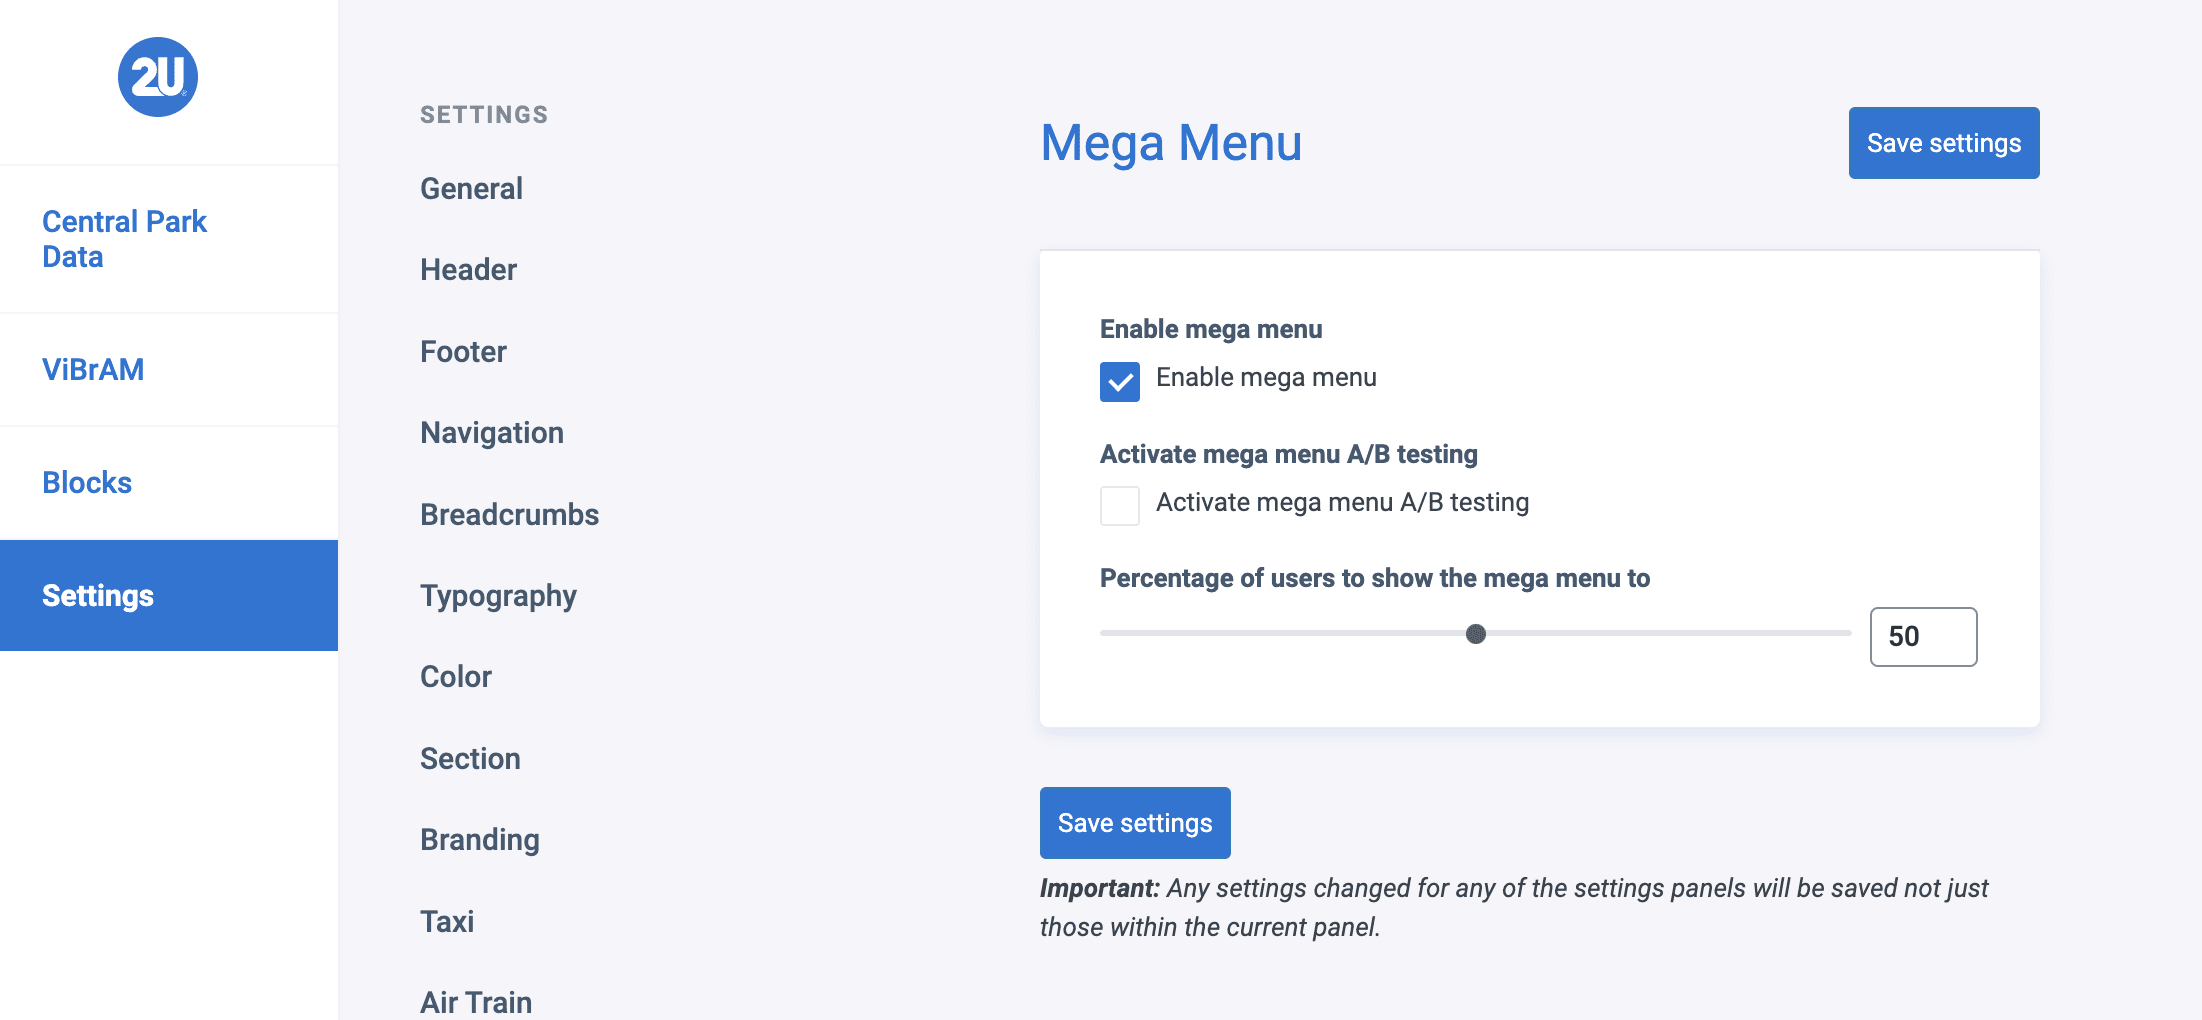
- Enable mega menu – Activates the mega menu to be displayed for all users on the front end. Unchecking disables it for all users.
- Activate mega menu A/B testing – Enables the A/B testing and automatically sorts users into ‘buckets’ of
showanddon't show - Percentage of users to show the mega menu to – Once the previous option is checked, the number in this setting determines the A/B split. The higher the number the more chance users have of being added to the
showbucket. The lower the number, the less chance users have of being added to theshowbucket
Note: If the Activate mega menu A/B testing setting in Global Settings > Mega Menu is activated, the VIP Cache Personalisation API is used to control the display of the Mega Menu with the following cookies;
name | value |
vip-go-seg | vc-v1__show_mega_menu_–_no |
vip-go-seg | vc-v1__show_mega_menu_–_yes |
Tracking & Analytics
If the class wp-block-bigbite-mega-menu-container is ever changed in code on the Mega Menu, the tracking has_mega_menu selector will need to be updated to match the new class.
A has_mega_menu property is added to the analytics page and track events, with a value of either true or false depending on the check with following selector document.querySelector('.wp-block-bigbite-mega-menu-container') to determine if a Mega Menu is currently on the loaded page.
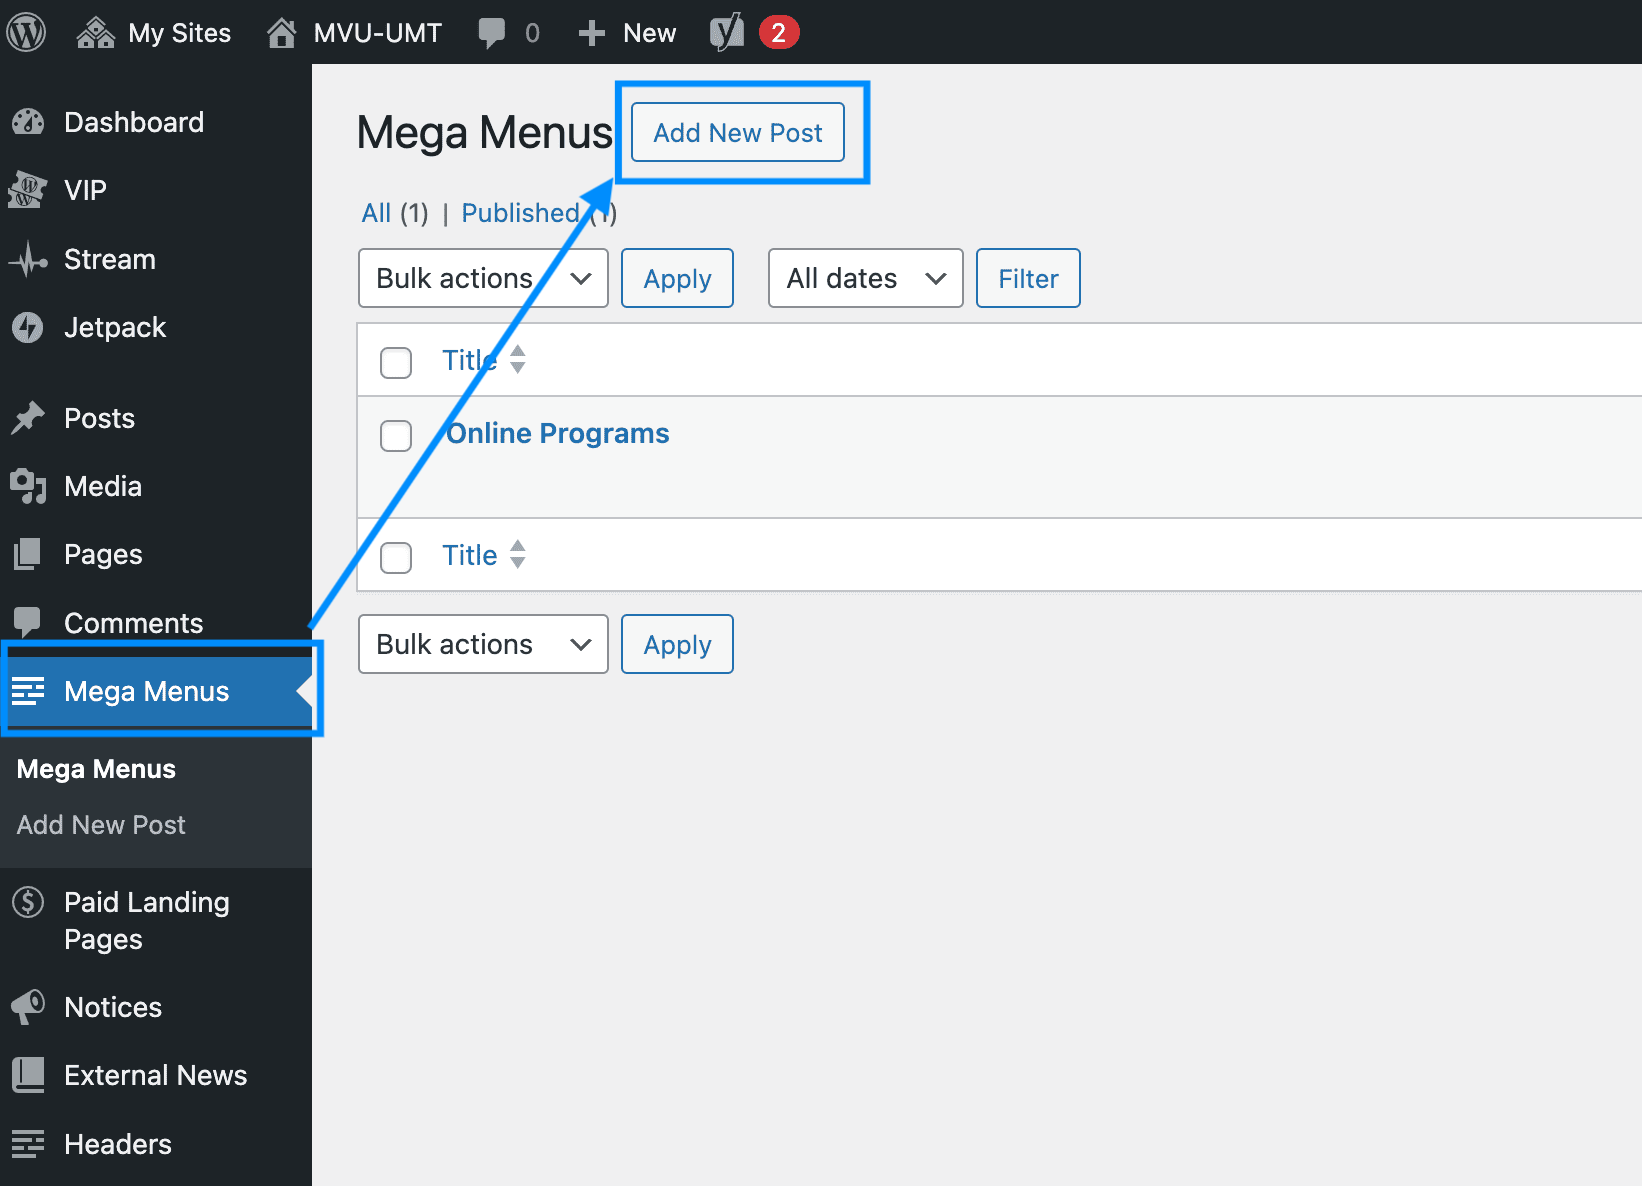
Once the plugin has been activated, you will see a new post type in the WordPress Dashboard, named “Mega Menus“, click on this and then click “Add New Post“
Give the Mega Menu a name/title, as you will use this later in the steps to select the correct one.

The Mega Menu Container block will be inserted by default into the block editor.
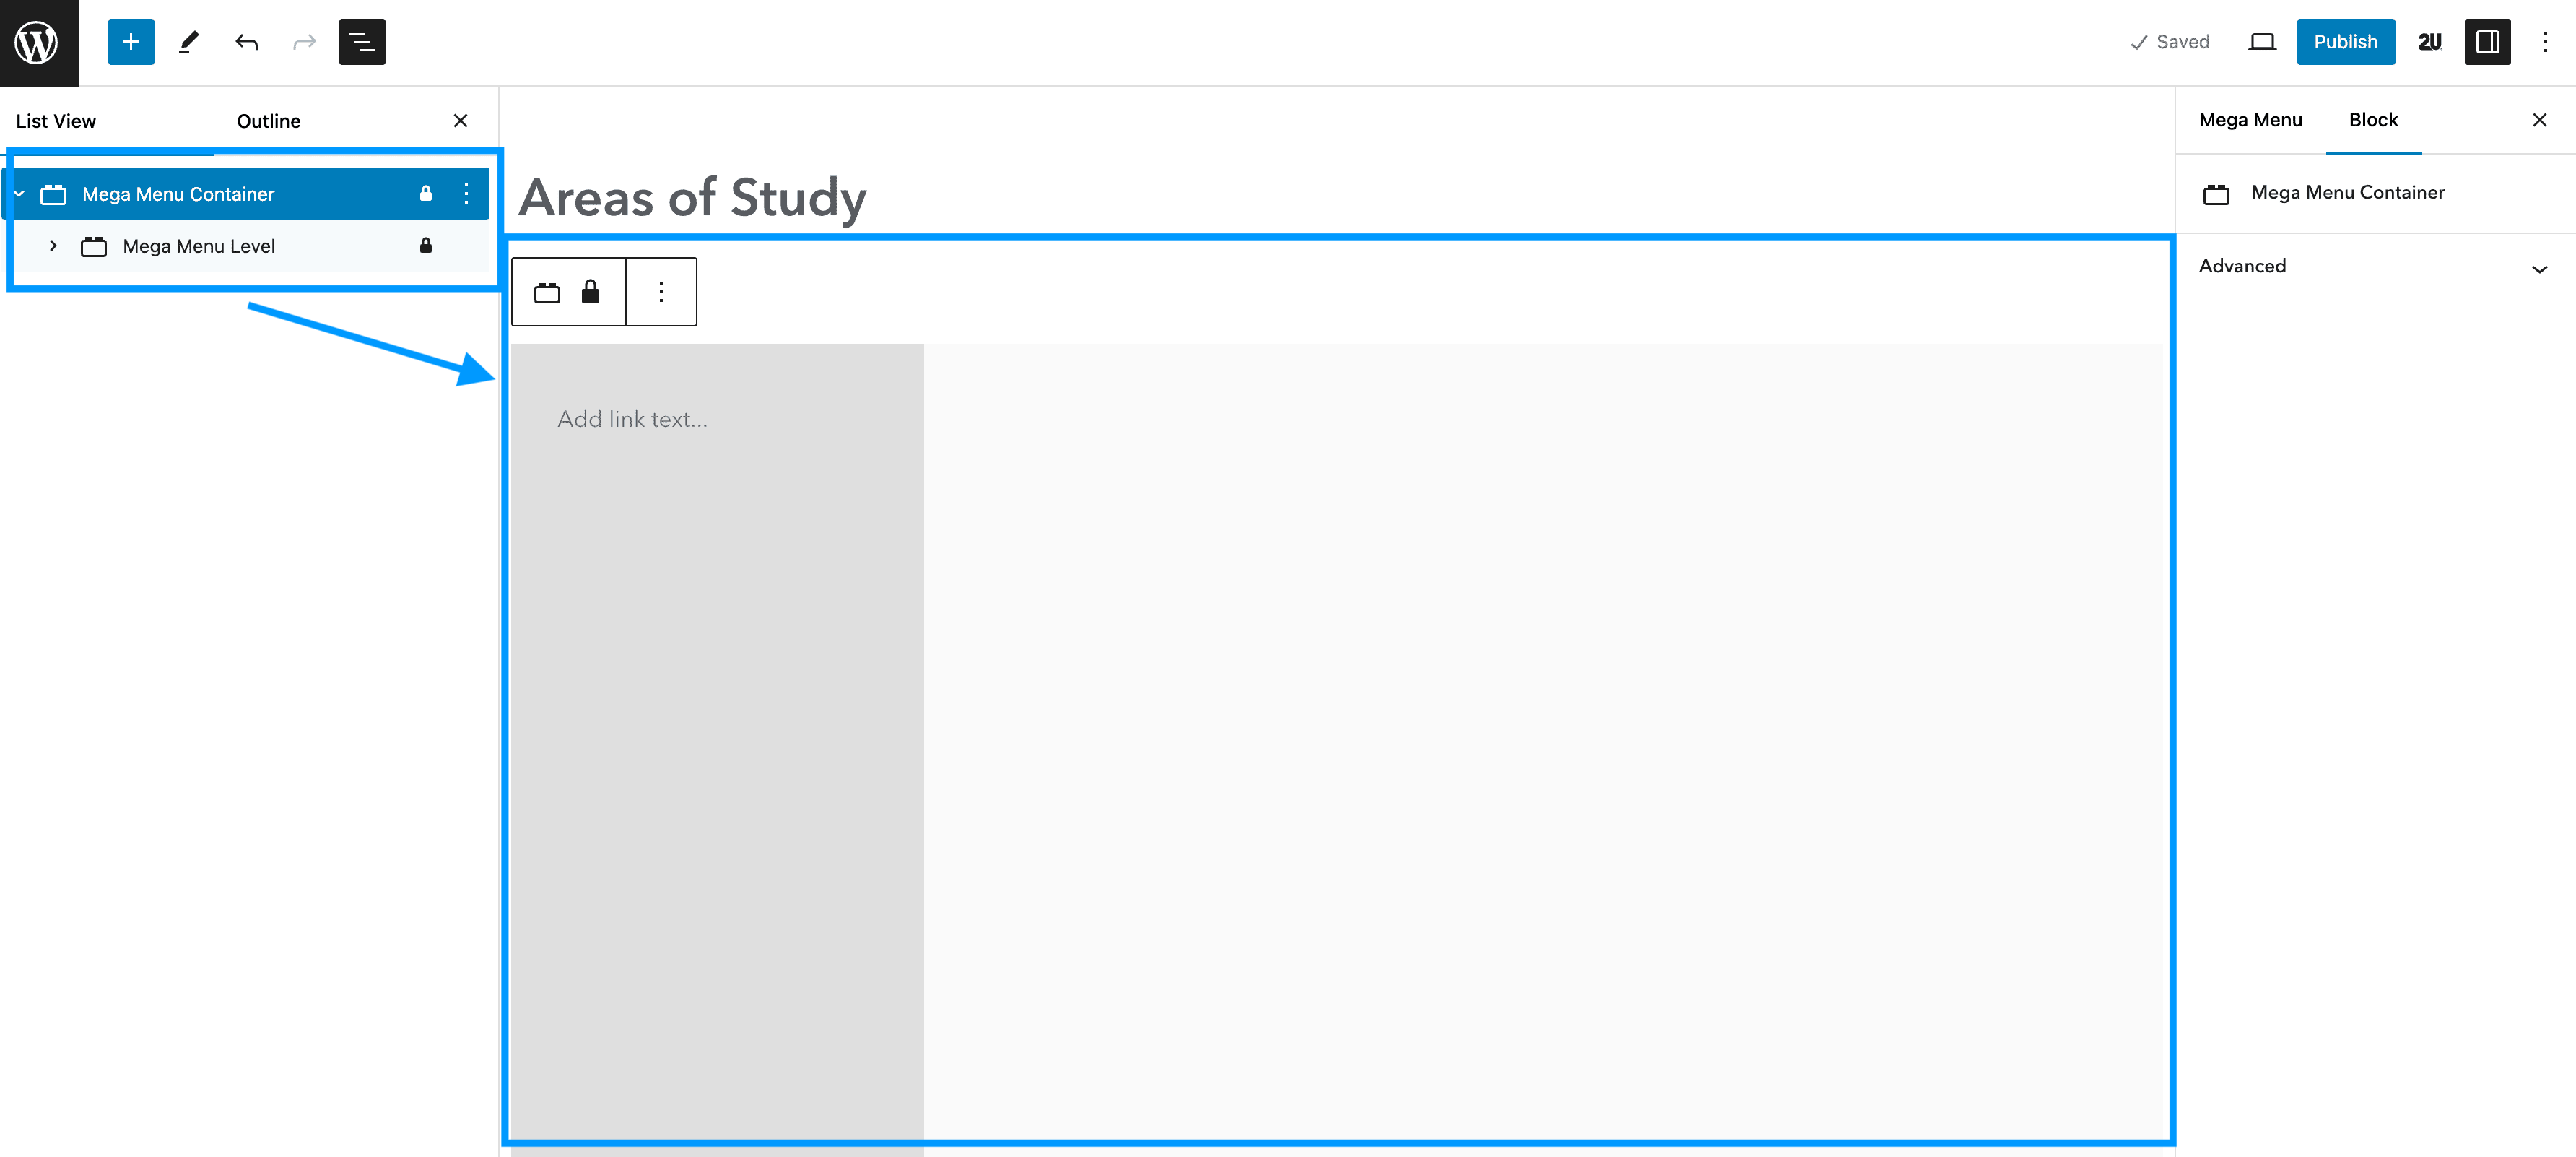
The Mega Menu Container will hold some nested blocks within it automatically, those being: Mega Menu Level, Mega Menu Nav and Mega Menu Item. To add Menu links, you need to be on the Mega Menu Item nested block.
Adding Menu Items
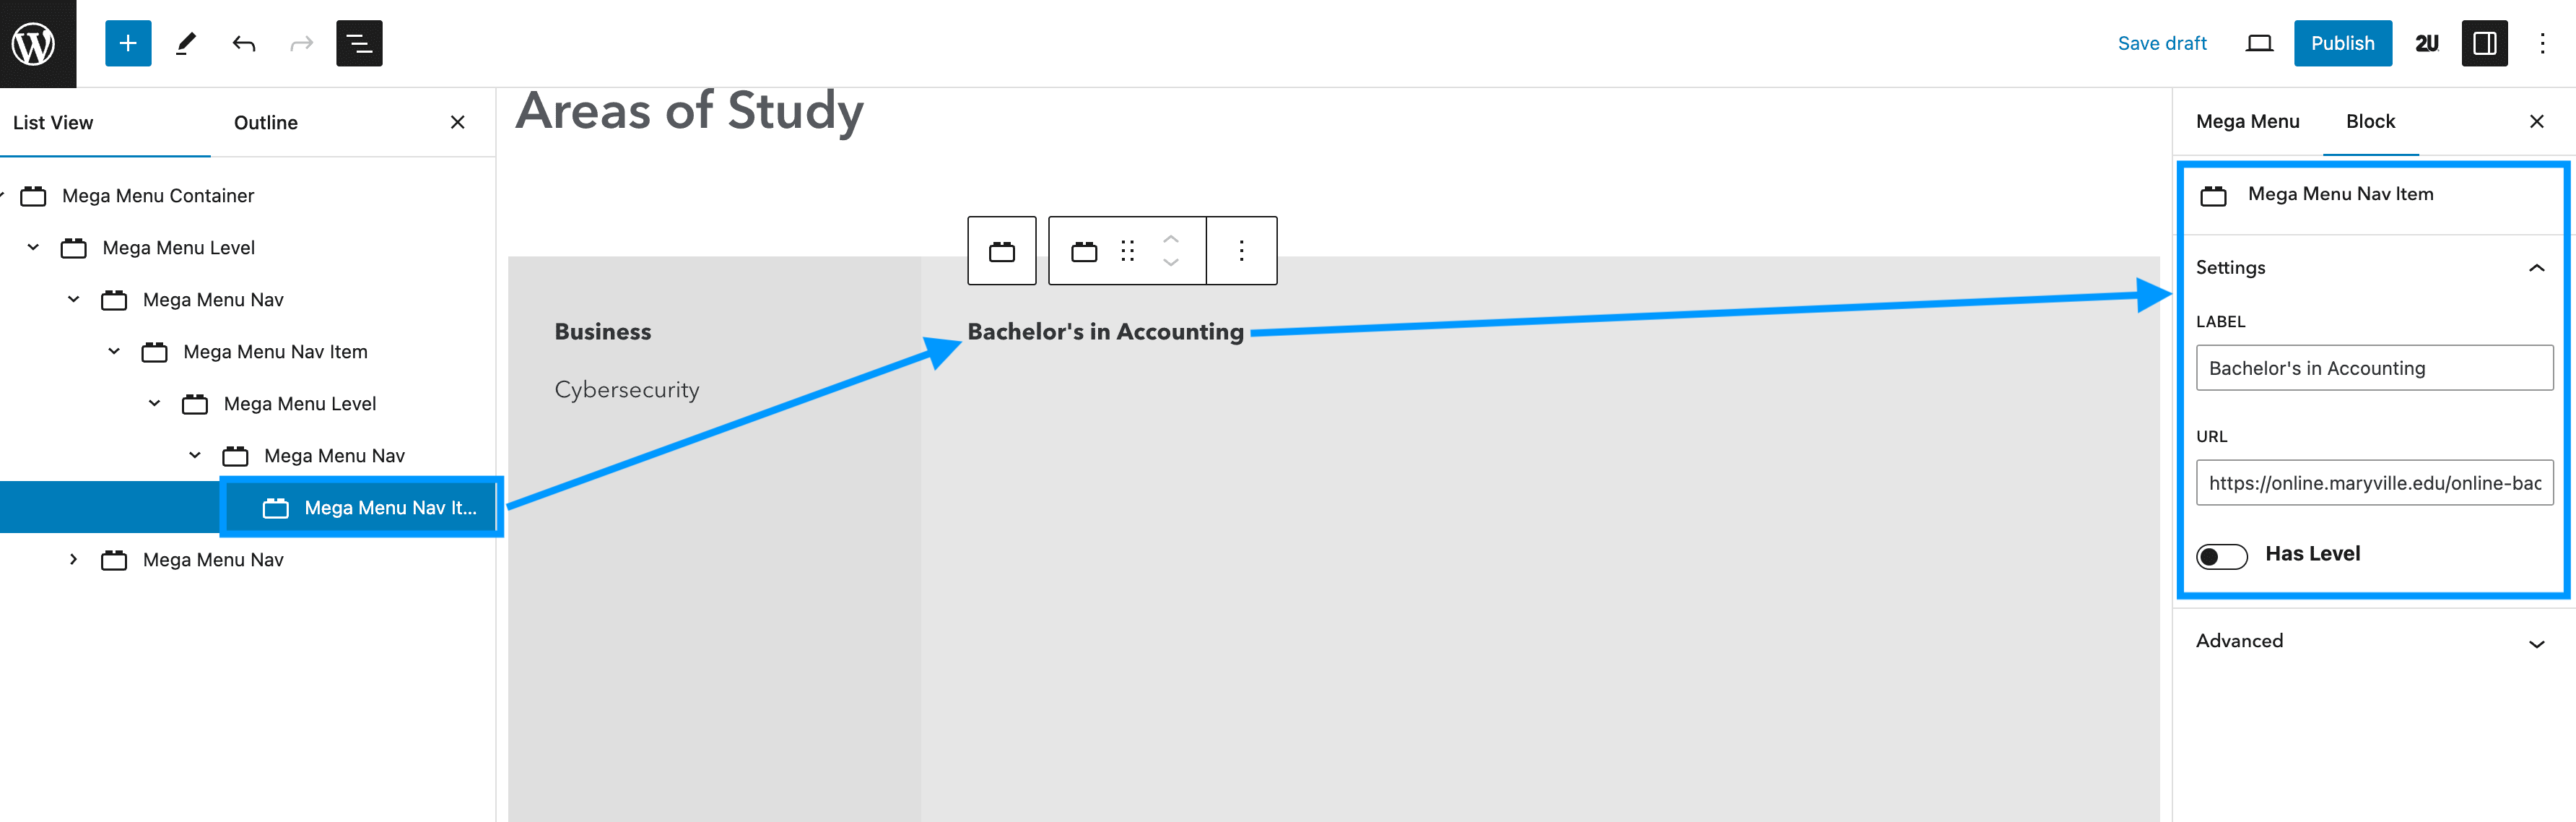
To add a menu item, go to the Mega Menu Item block and type the name of the link you want to add. You can do this directly inside the block, or by using the Label field in the block settings sidebar.
You can then add a link to the menu item in the URL field in the block settings:

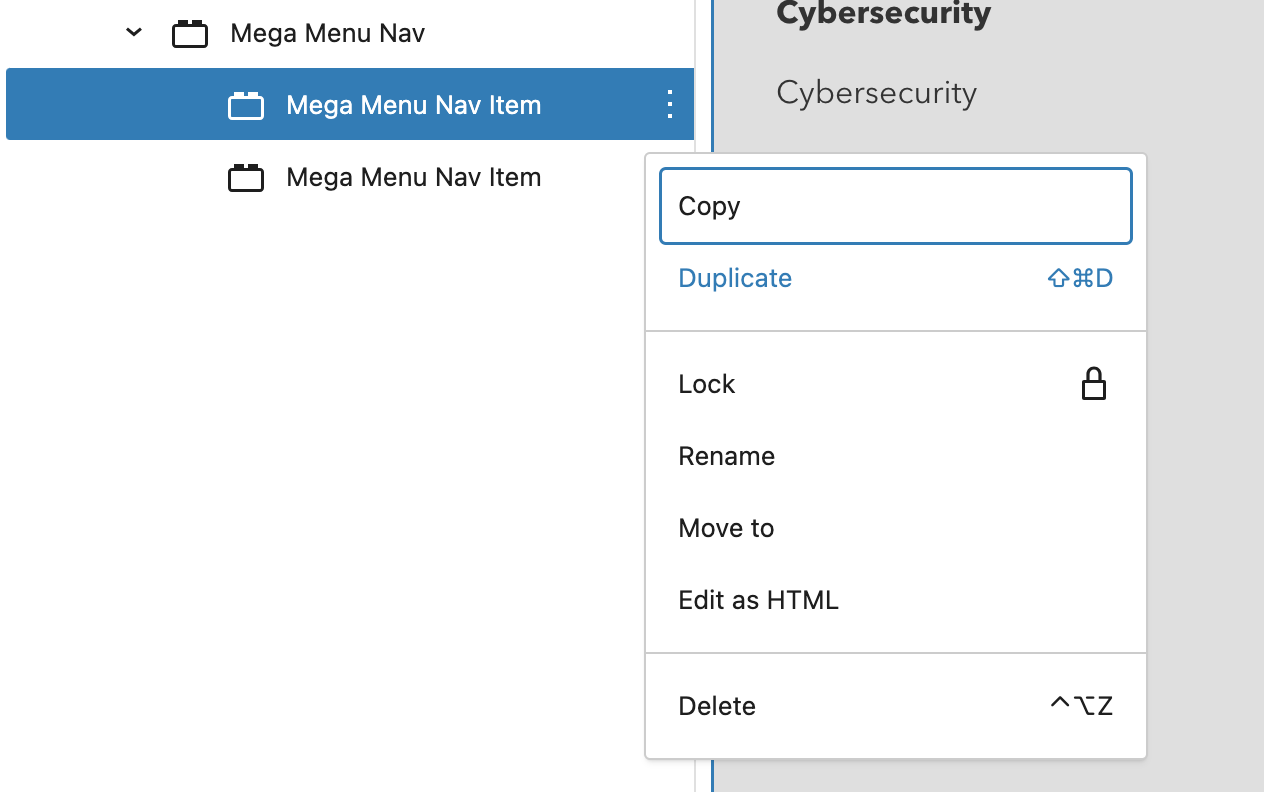
To add another menu item directly below at the same level, the quickest way to do this is to duplicate the Mega Menu Nav Item block used for your first link.
You can then edit the Label and URL fields:

Adding Mega Menu Levels
To add the next level of the navigation (second level), you need to enable the Has Level toggle on your Mega Menu Nav Item blocks where you want a second nav level to appear:
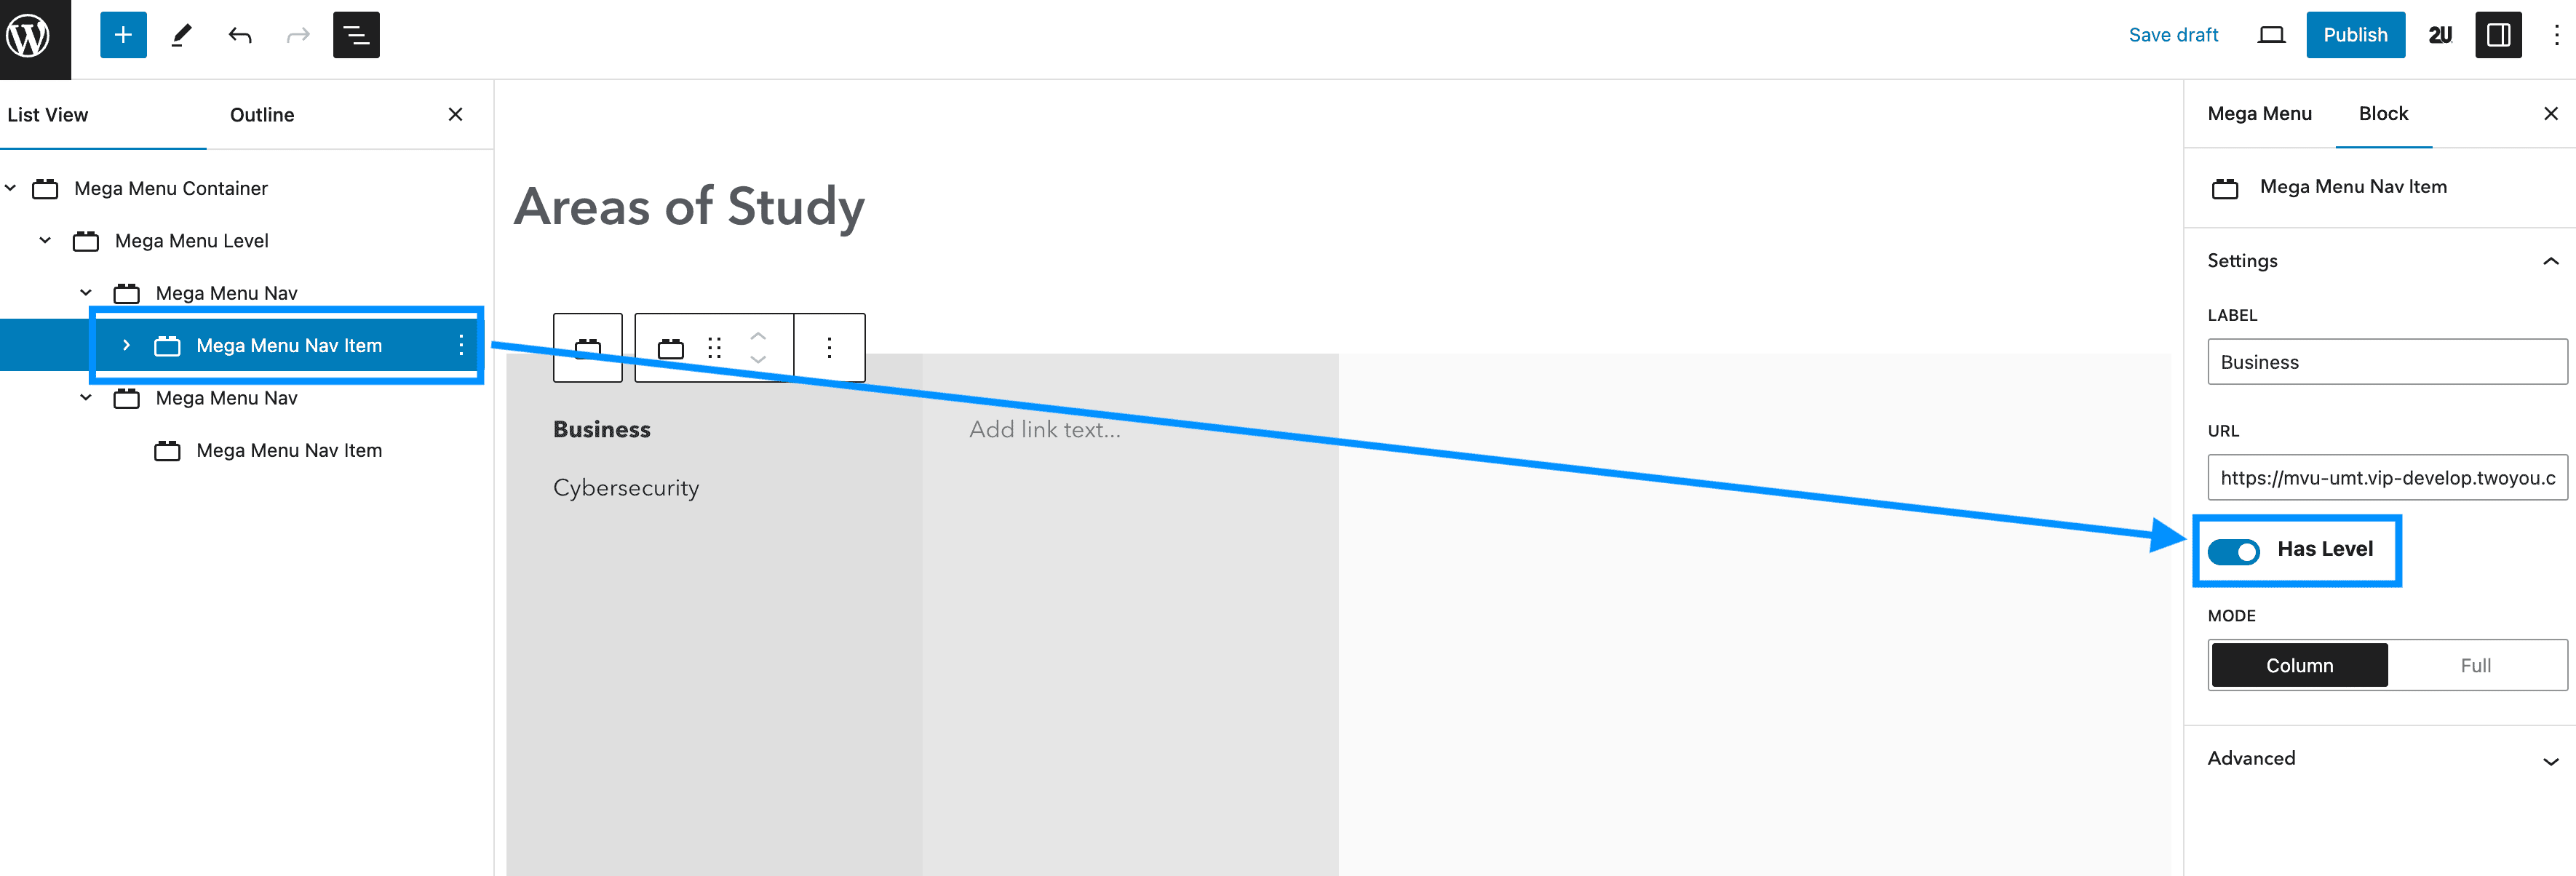
After enabling the toggle, you will see a new setting appear named “Mode” which will give you the options of Column or Full.
Column – sets the level within a new column, matching the width of the first navigation level. This is best used when you have a second nav level you want to create.
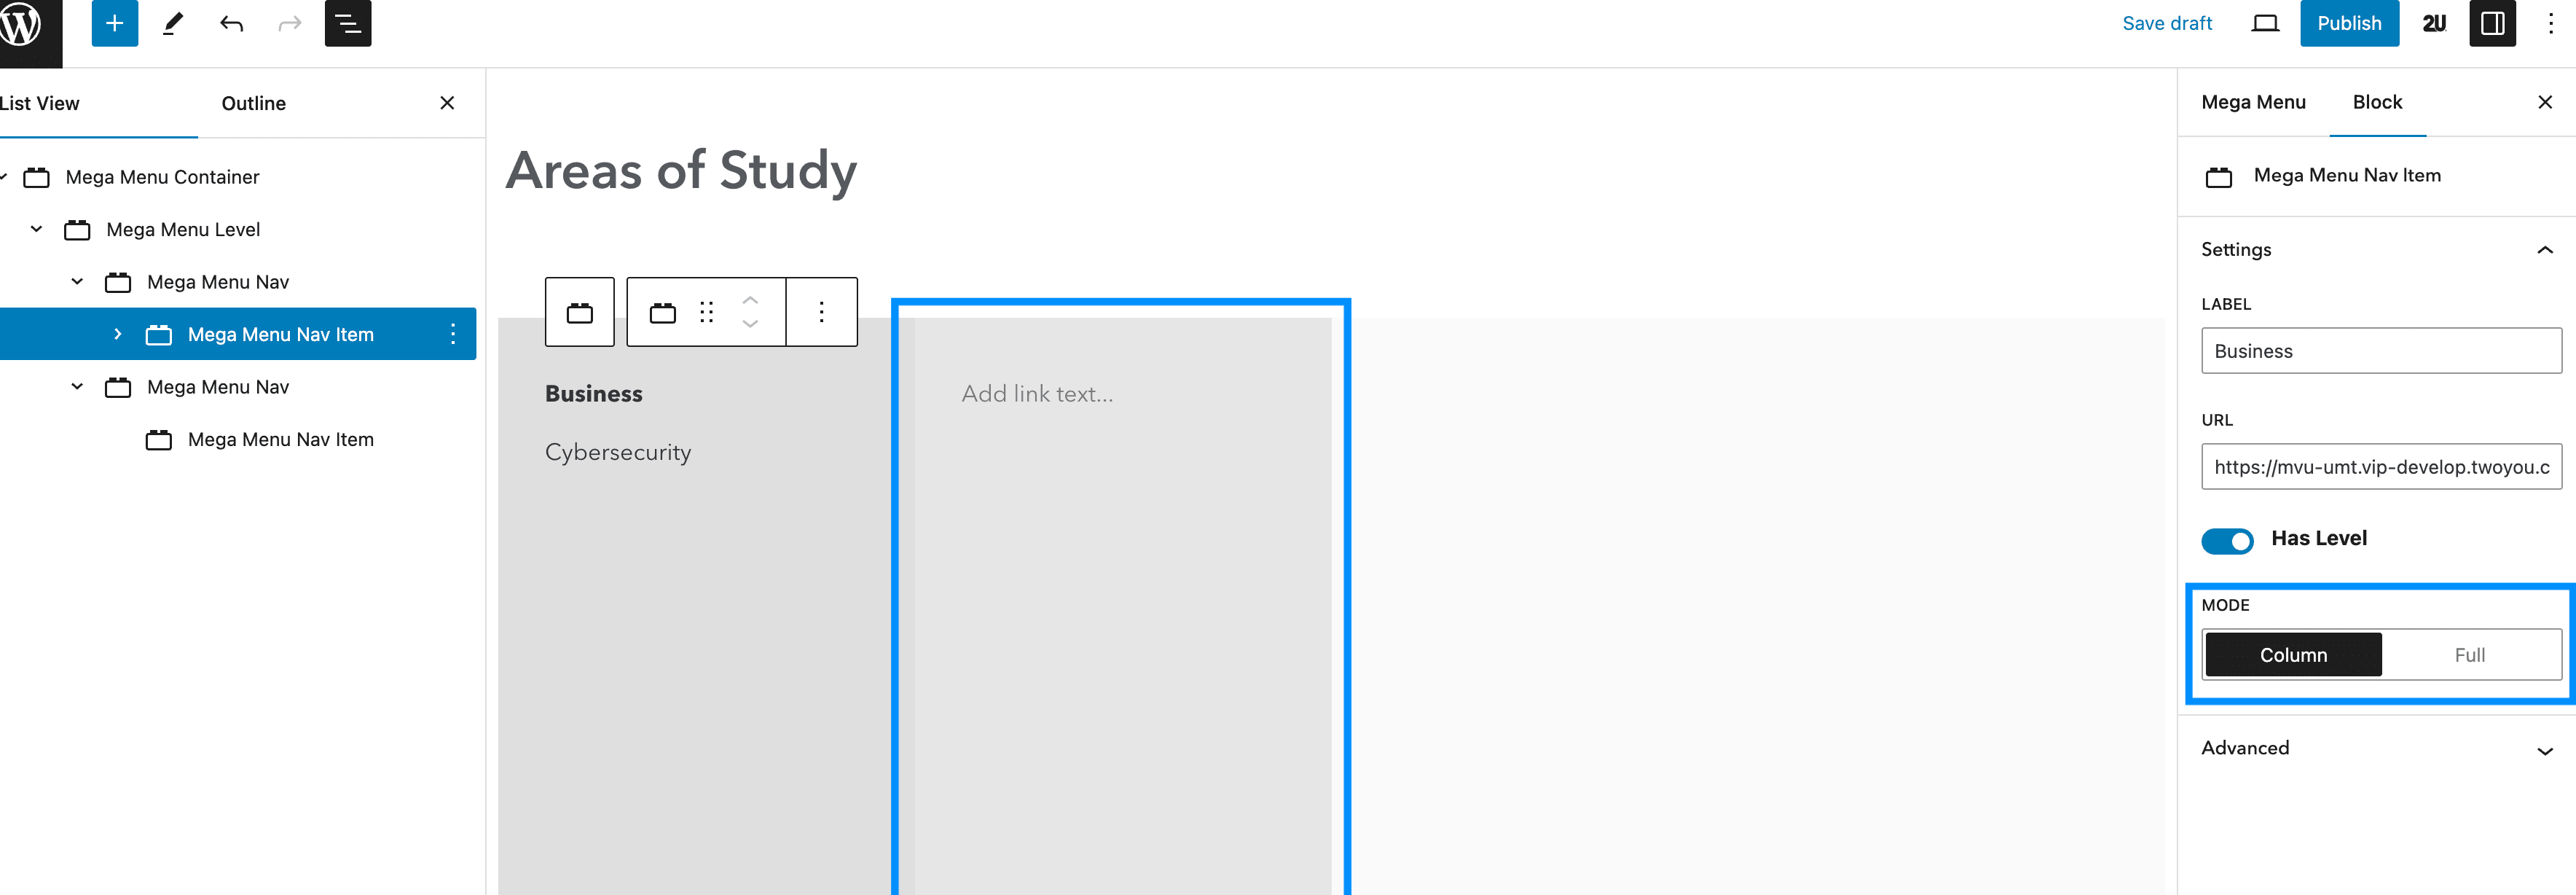
Full – sets the level to span the available remaining space in the nav. You can use this setting when you don’t have a second nav level, but want to add things like CTAs or paragraph text:

To add second level nav items ensure you have the Mega Menu Nav Item block inserted, nested within the Mega Menu Nav block:
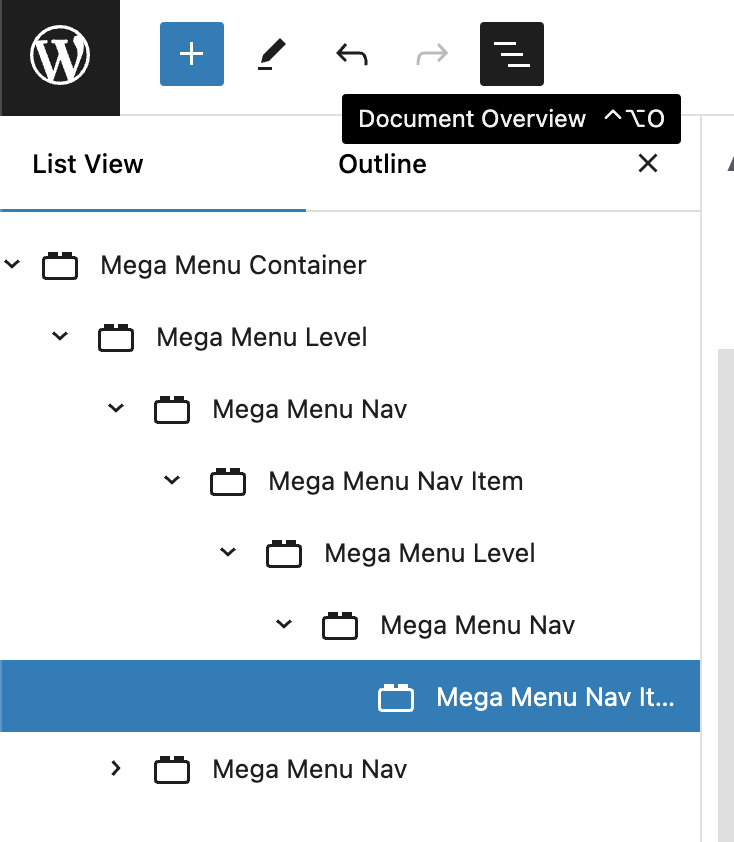
With the way that the Mega Menu block uses a lot of nested blocks, if you begin to find it hard to navigate through each level/menu item, you can use the Document Overview tool which will show you all of the blocks & nested blocks in order the appear on the page.
Once you have finished building your Mega Menu, click Publish in the block editor. This will allow you to then Apply that Mega Menu in the next steps below.
Applying the Mega Menu
In the WordPress Dashboard, go to Appearance > Menus.
Make sure you select the Primary Navigation:
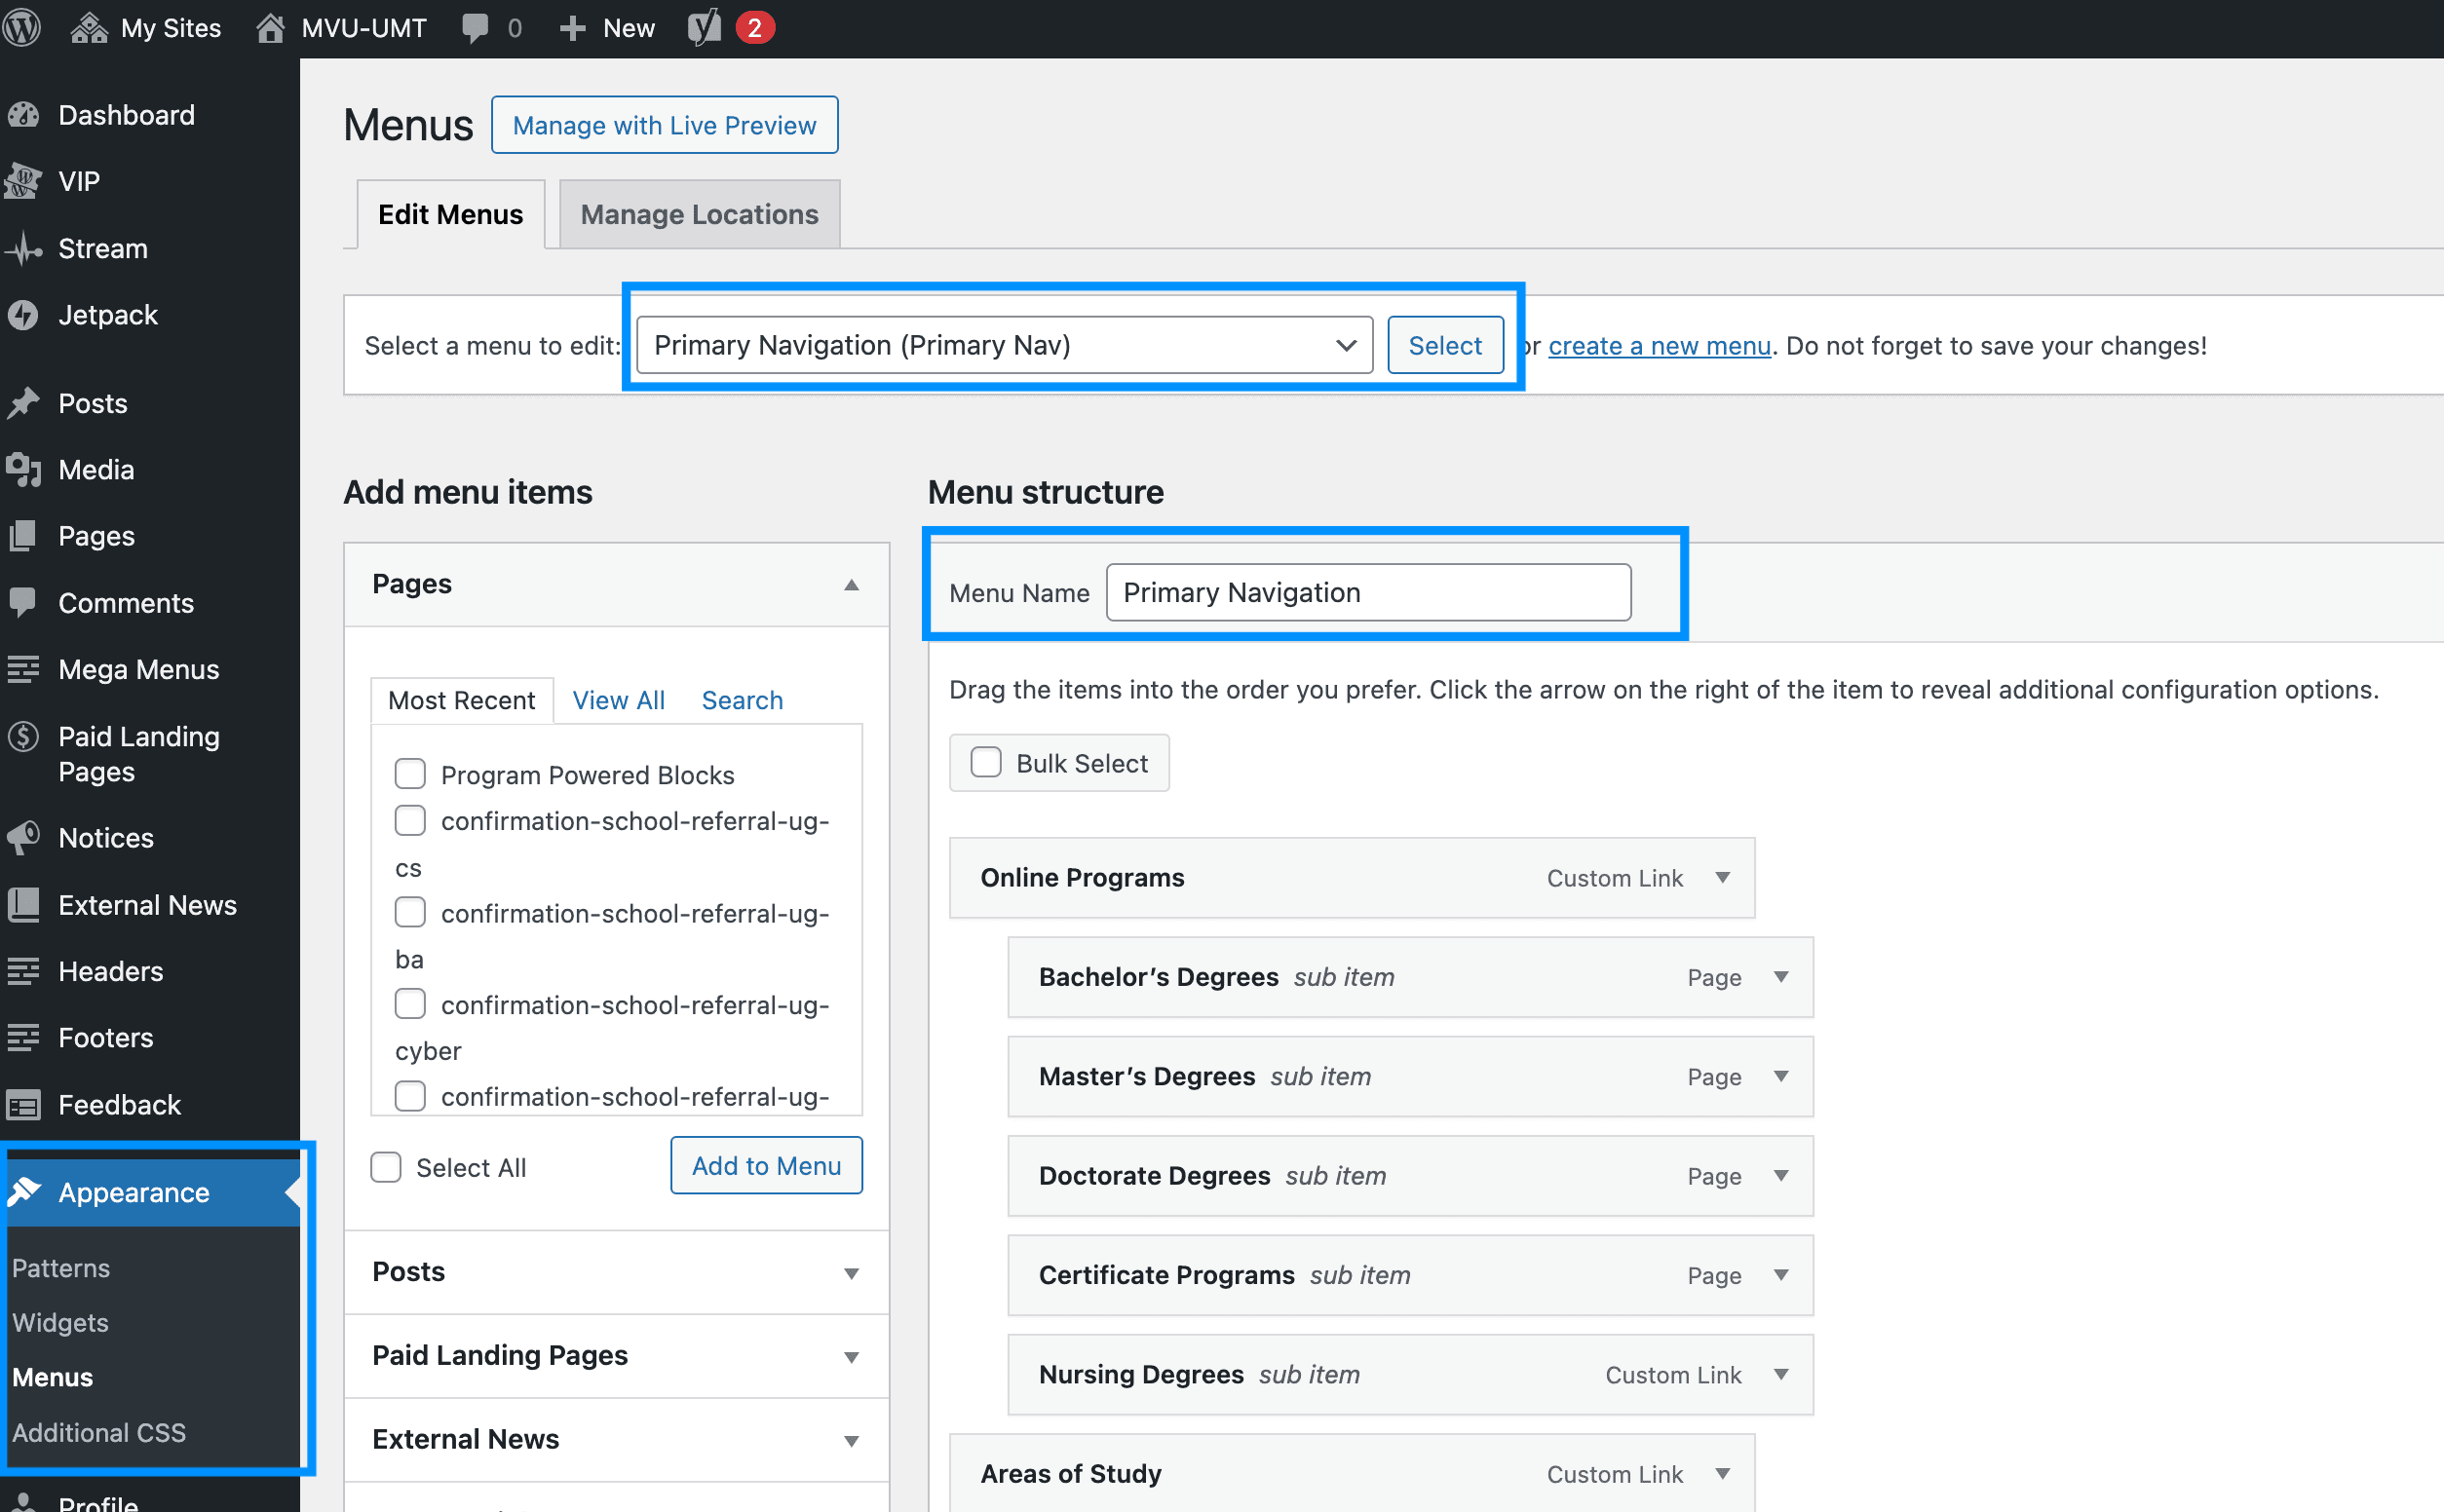
You then need to expand the menu item that you want to apply the Mega Menu to – e.g. in the example below, we have used the “Areas of Study” page to apply the Mega Menu to.
You will see a new setting named “Mega Menu ID” and a dropdown below it. From the dropdown, select the Mega Menu you want to apply.
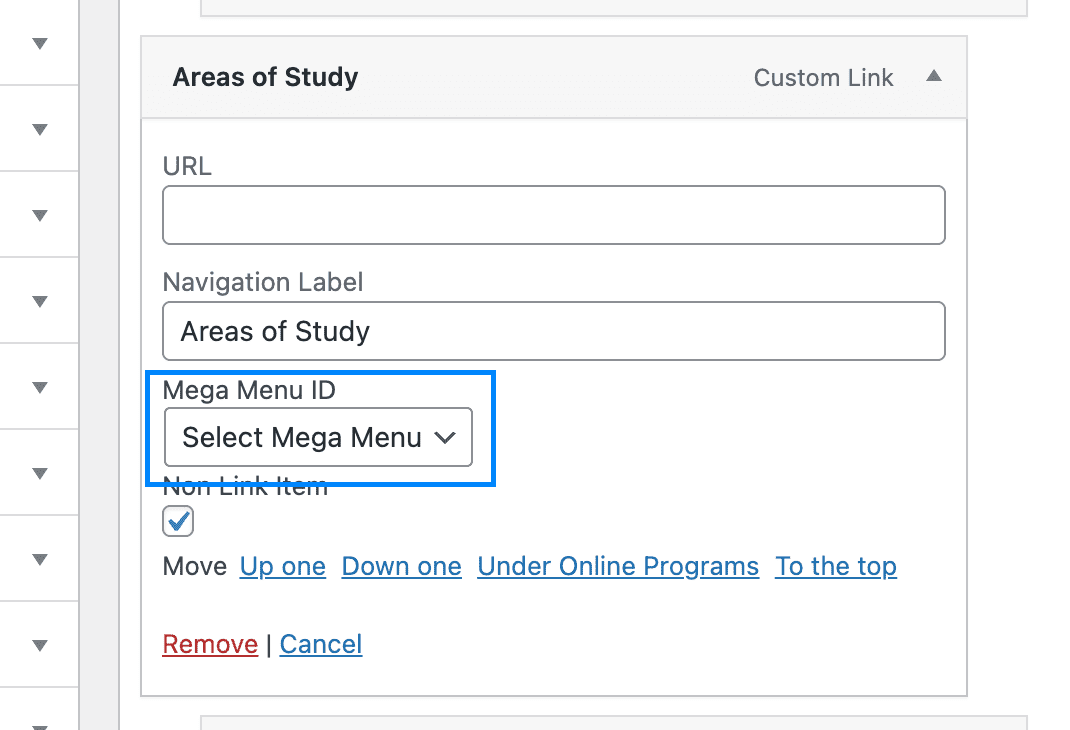
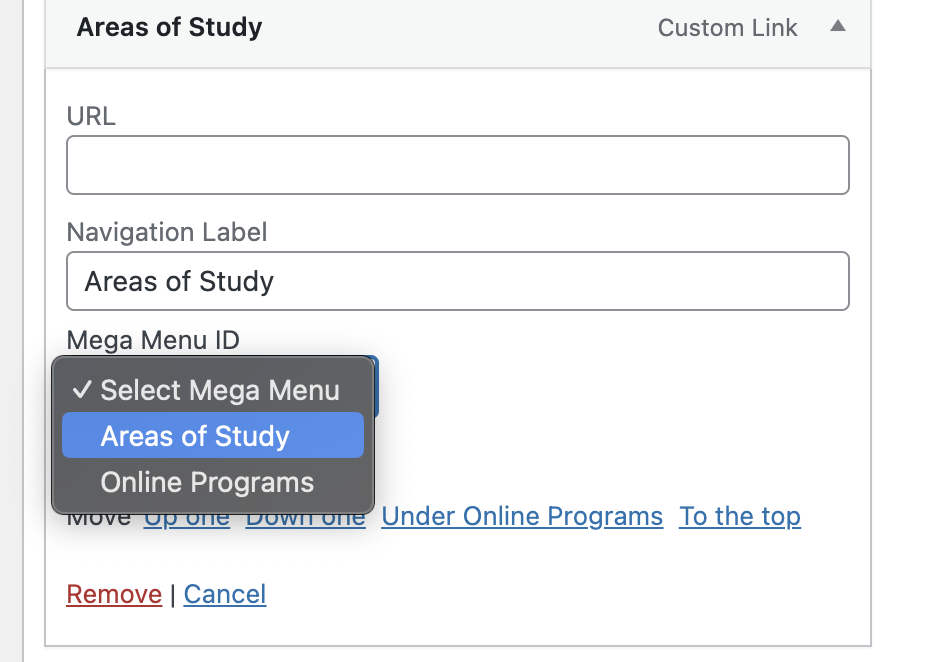
Click Save at the bottom of the page.
Go to the front-end of the site and you will see the Mega Menu applied:
