Programs
The Programs post type lives on both a Network and Site-level (if the Programs plugin is enabled on the site). This post type is used to store the data for all Programs, which can then be displayed across site(s) using the Programs Blocks.
The Programs post type will appear on the sidebar in the WP Dashboard, if enabled on the site. If you are on the Network admin, it will appear there all of the time.
Clicking on the Programs post type will take you to the post list screen, where you can view all Programs that have been added:
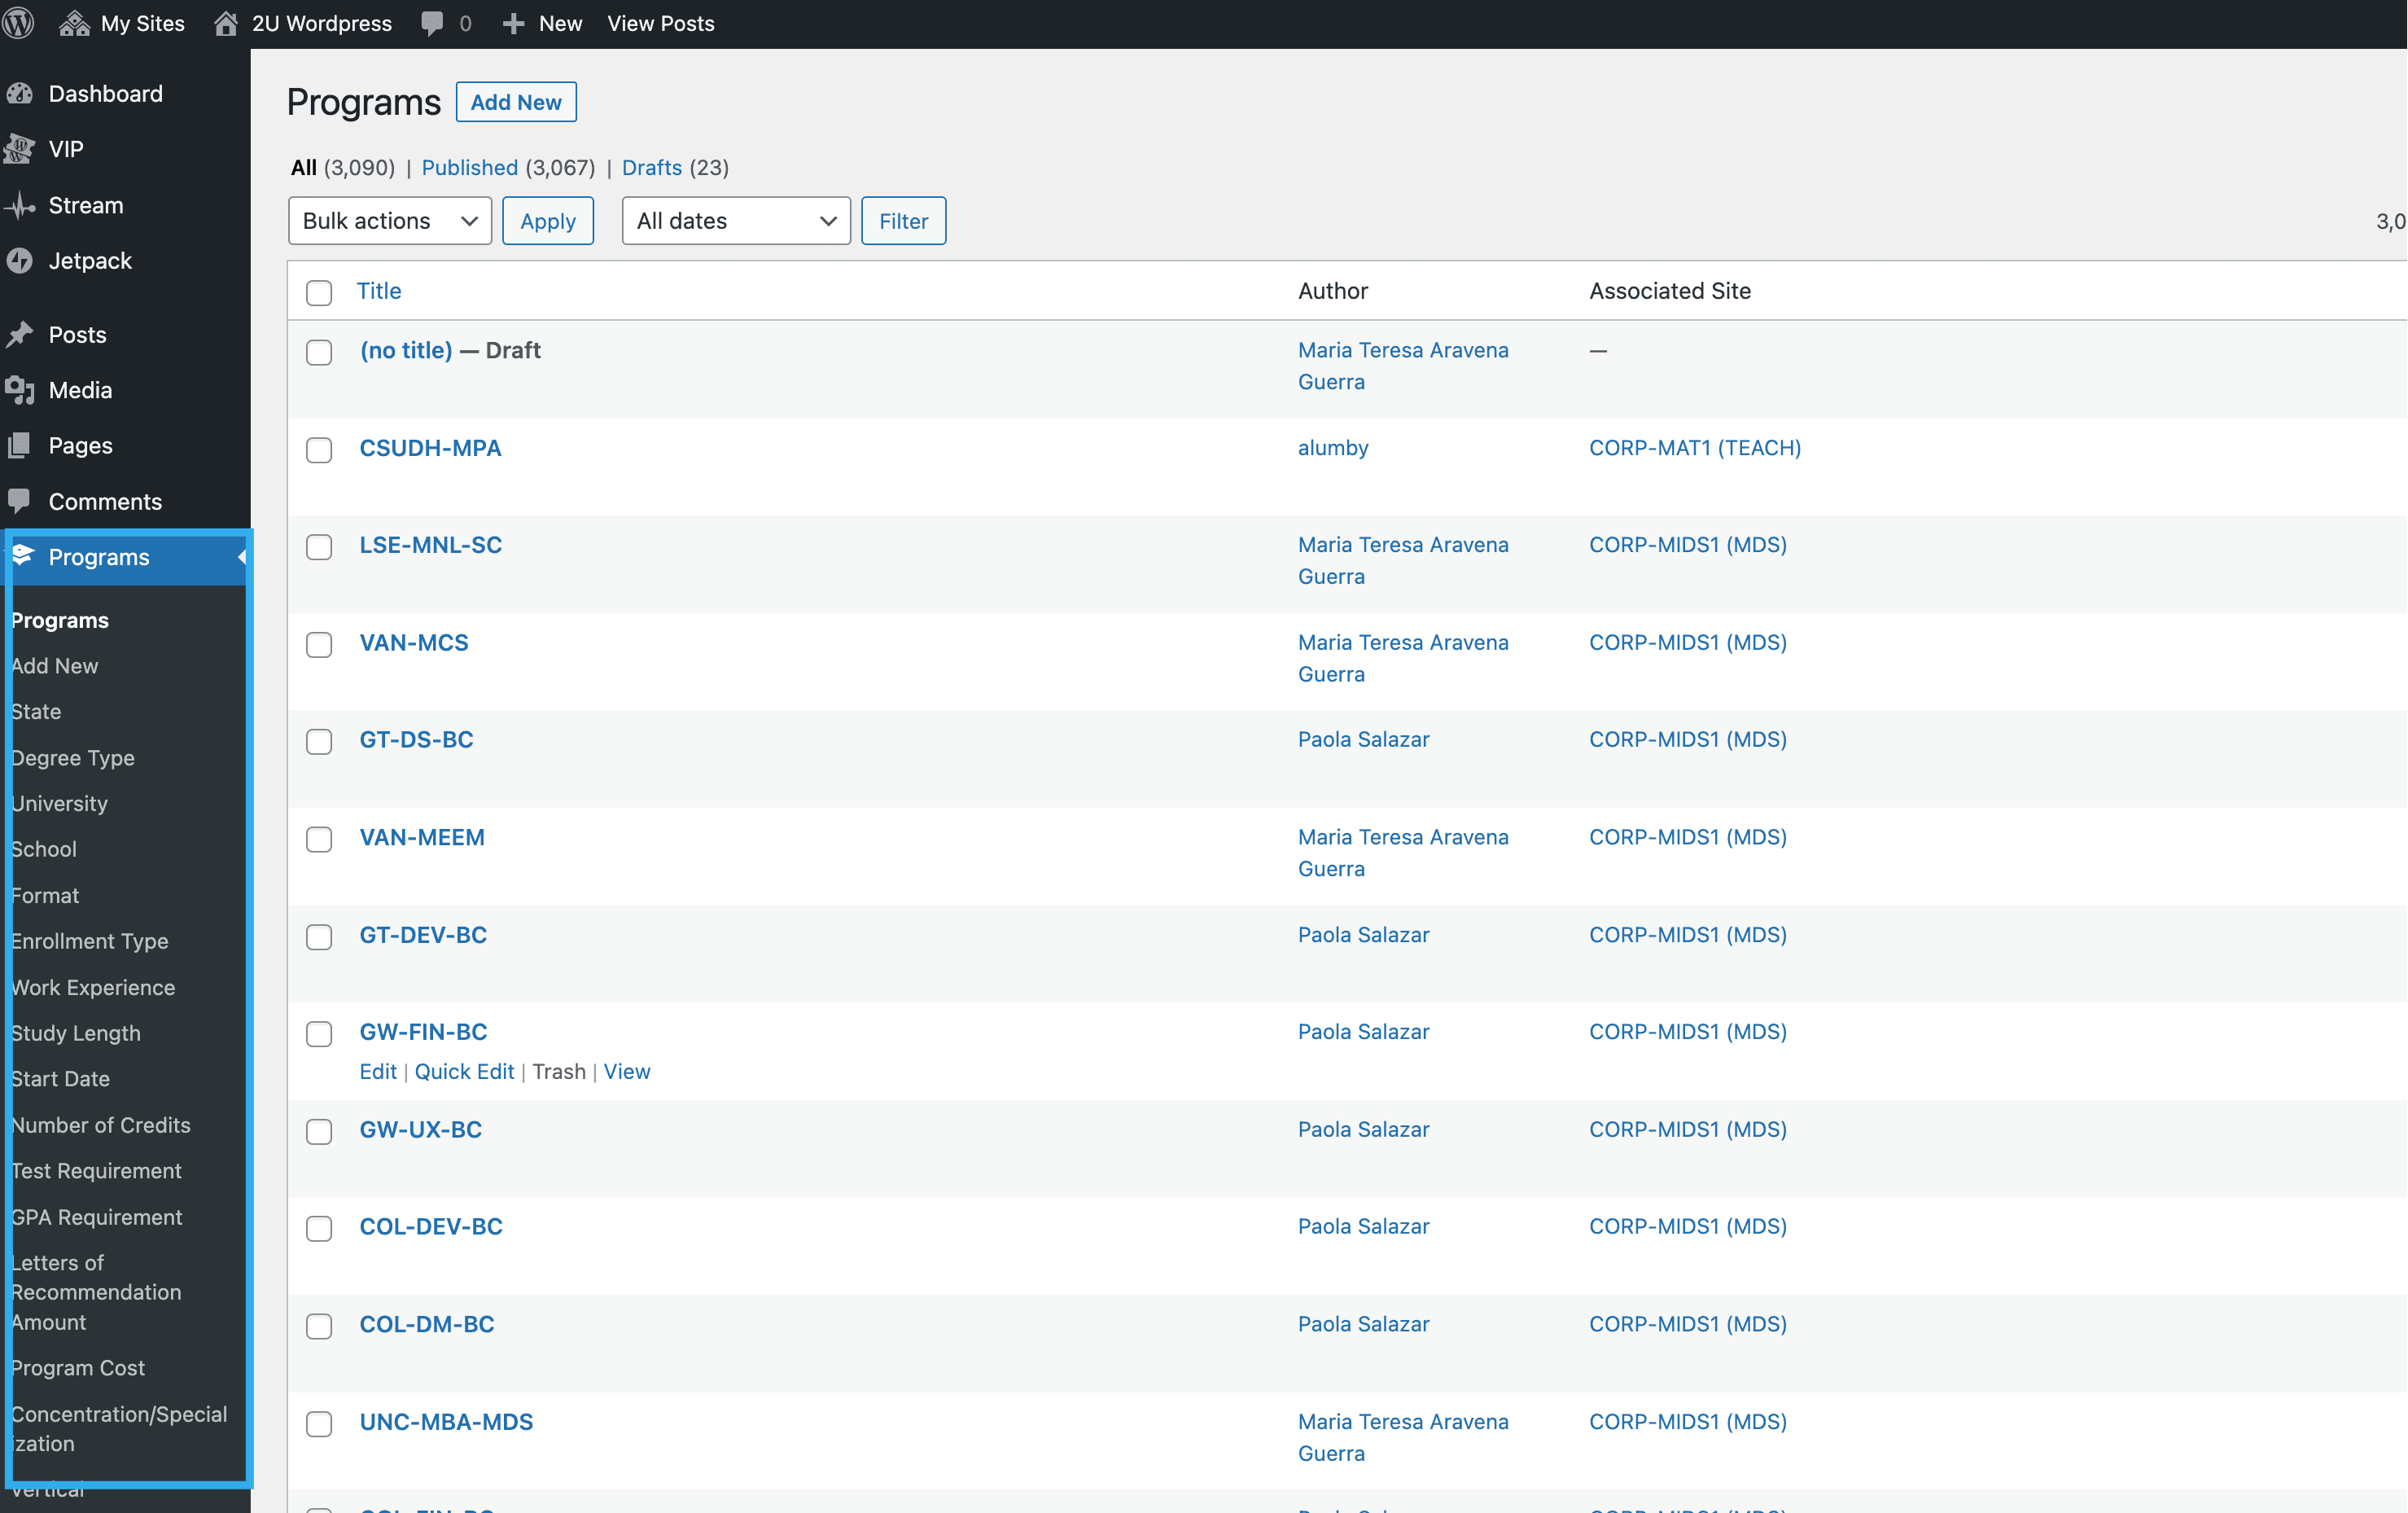
You can also view all of the taxonomies in this post type e.g. Degree Type, on the left-hand side as shown above.
Adding a new Program
To add a new Program, you should do so at Network level or the ‘base’ site.
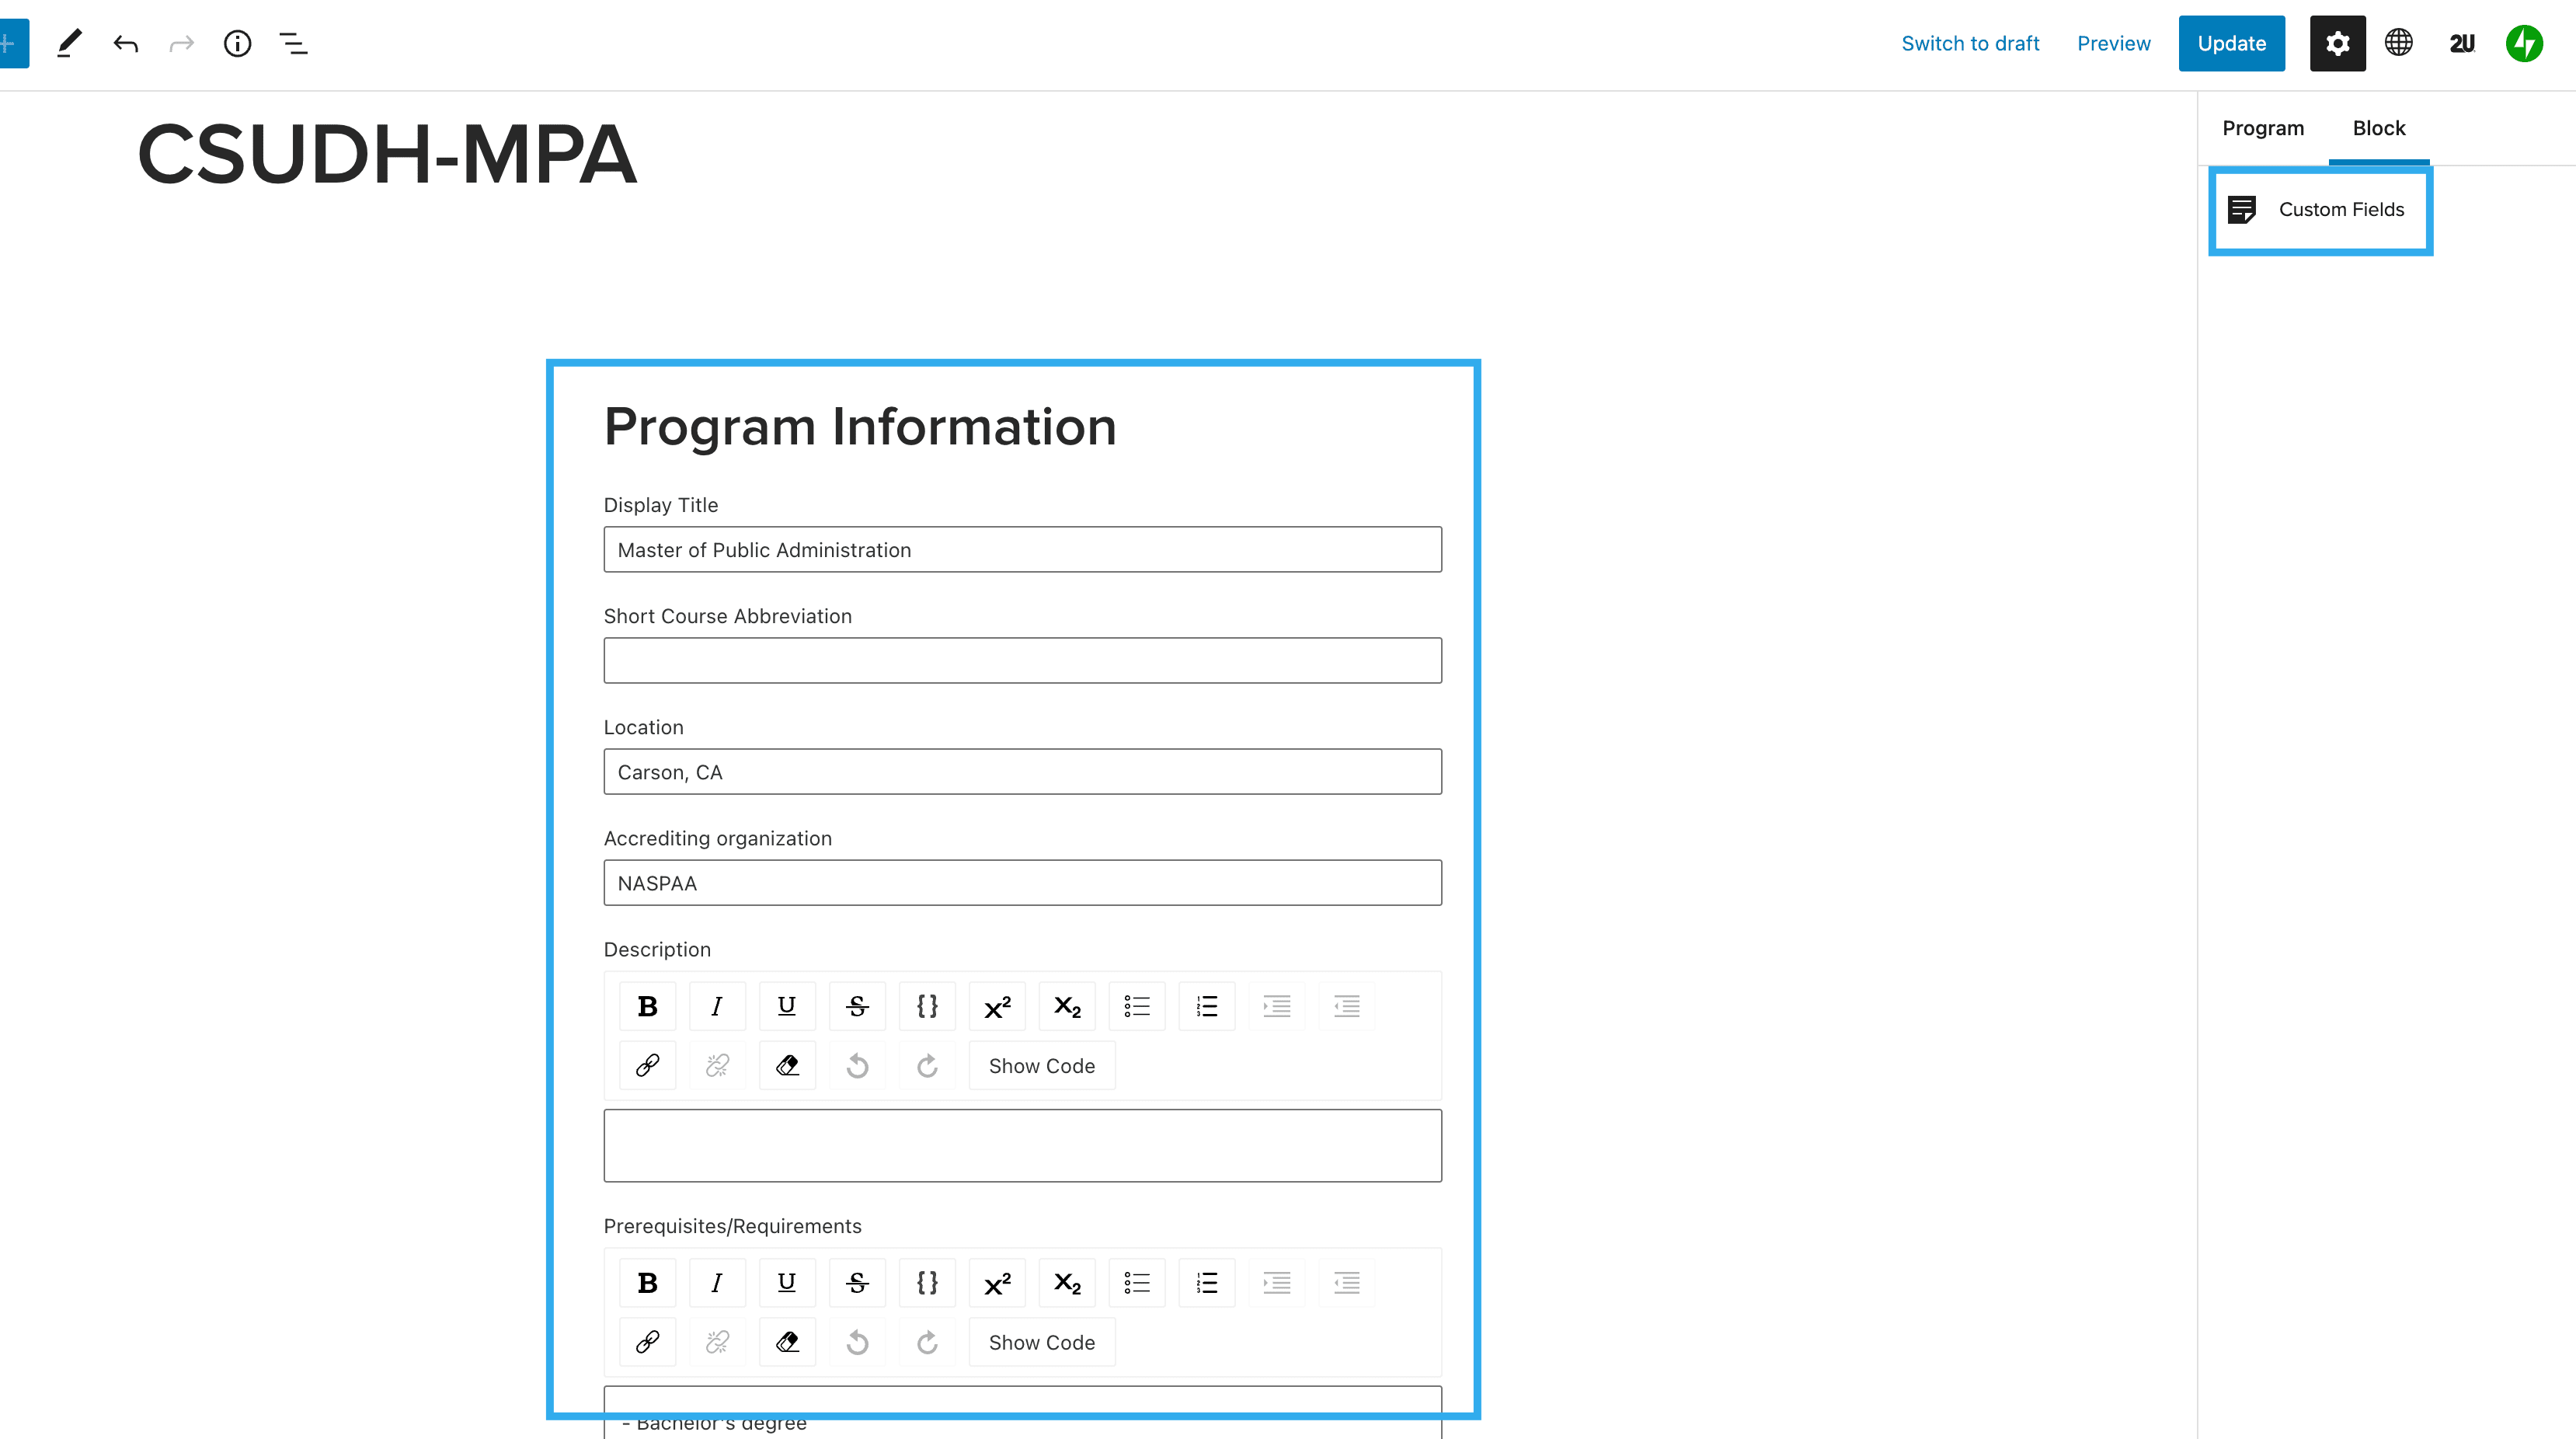
From the Programs post type, click ‘Add New‘ – you will be taken into the editor which will have a Custom Fields block inserted by default. This is where you can enter all of the Program data:
Once complete, you can click the ‘Program‘ tab in the right-hand sidebar to enter further Program information such as Taxonomies, set the Program as a ‘Sponsored Program‘ and/or exclude the Program from feeds across sites using the Programs Blocks.
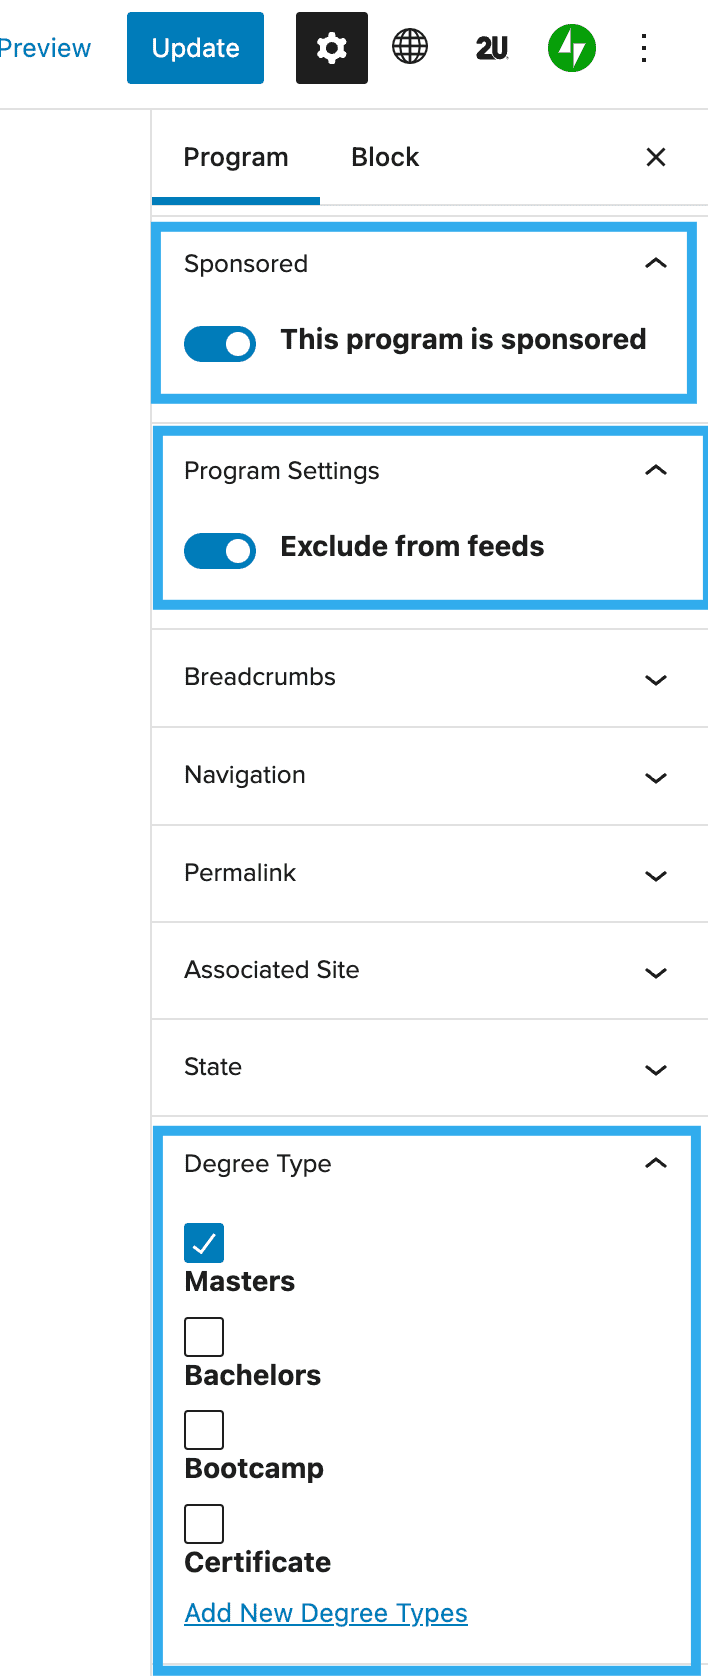
From this sidebar, you can also select an ‘Associated Site‘ for your Program, you can select one, multiple or none.
The Taxonomies to populate are:
- Associated Site
- State
- Degree Type
- University
- School
- Format
- Enrolment Type
- Work Experience
- Study Length
- Start Date
- Number of Credits
- Test Requirement
- GPA Requirement
- Letters of Recommendation Amount
- Program Cost
- Concentration / Specialization
- Vertical
- Field Placement Support
- Campus Visit Requirement
- Number of Factors Met
Once you have populated all of the required fields, you can Publish the Program and it will appear in the list of Programs in the post list screen. It should now also be available to pull through via the Program(s) blocks on a site-level Page/Post.