Do you need to request an Audio Description for a video? You can jump to the Audio Description instructions further down the page.
Transcribing Youtube Videos via 3PlayMedia
All of our videos are captioned by a third-party service called 3PlayMedia. If you don’t have a login already, please reach out to Helpdesk to get access. After getting login credentials, you can access the admin here:
https://account.3playmedia.com/user/sessions/new
Before being able to caption videos, you’ll need to confirm the following:
- Is the video hosted on a Youtube account owned by the program, or by the school (this may or may not be ok)?

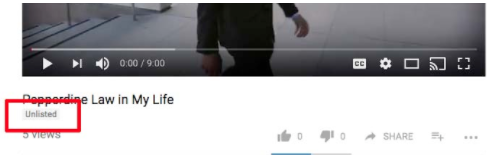
- Is the video set to ‘public’ (not ‘unlisted’ as shown in the screenshot below)
When getting a request to add a video to our sites, you should always confirm that the video is captioned. You can check this by looking at the video on YouTube.
- Click on the CC button to enable Closed Captioning (if this isn’t even an option, then you can be pretty certain the video is not captioned)
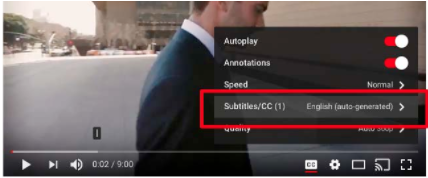
- Click on settings, and then look at the “Subtitles/CC” section.
- If the video only have ‘auto-generated’ captioning, this means we need to submit it for captioning
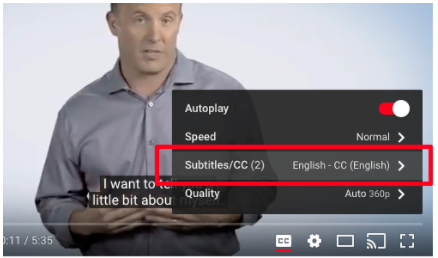
- If the video has “English – CC (English)” then the captioning is accurate and meets our accessibility standards
Once you are sure a video needs to be captioned, you then need to request “Manager” access on the Youtube channel.
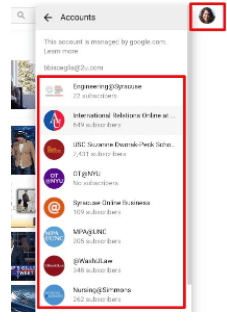
You can check if you already have access by going to Youtube, clicking on your profile image on the upper right, and clicking “Switch Account”. You should see a list of any YouTube Channels that you have access to edit.
If you do not have access, reach out to the brand manager and request to be added. If this is a new account, you should also request that your manager be added as well.
Ready to Caption?
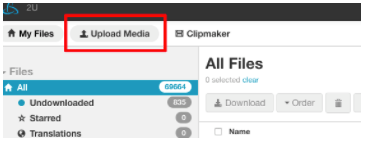
- When you are ready to submit a video for captioning, go to the 3PlayMedia site. In the top left menu, click on the “Upload Media” button.

- For existing accounts:
- click the Linked Account button and choose your program.
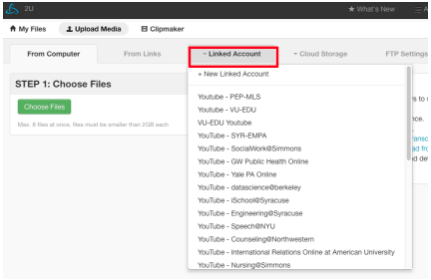
- If this is a NEW account:
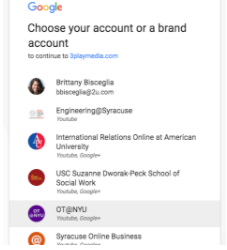
- click the Linked Account button and choose +New Linked Account. Select Youtube, then you should be able to select your program from the list.
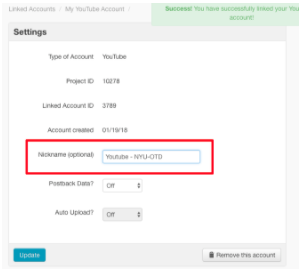
- In the naming options, set the name to “Youtube – program name”
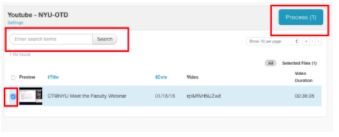
- You should then see a list of videos (some programs have multiple pages of videos), with the most recent ones shown first. You should check your programs occasionally to make sure all videos are captioned. Captioned videos are grayed out.

NOTE: For Youtube accounts that are owned by the school, we should NOT caption every video. ONLY videos embedded on our program sites/blogs need to be captioned.
- For any video(s) you would like to submit for captioning, click the checkbox next to the video. If you don’t see your video, try searching based on the YouTube ID. After checking your video(s), click the “Process” button.
NOTE: If you still don’t see your video after searching by ID, this may be because it is unlisted/private. You can either request from brand that we change the video to ‘public’, or you will need to manually caption the video (See below for instructions)
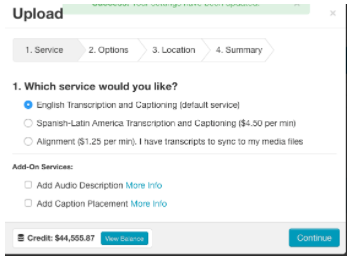
- Follow the prompts in the pop-up window. You can leave all prompts at the defautt option on steps one and two.
- On the Location step, choose the existing folder option and find the Marketing-specific folder.
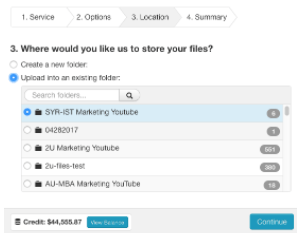
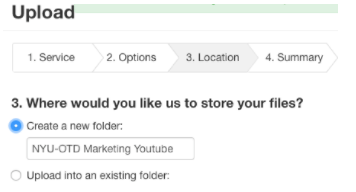
- If this is a new program, you can create one. Folder names should include the program name followed by “Marketing Youtube”.
- Continue to step 4 and check the “I am aware…” checkbox, then click “Place Order”.

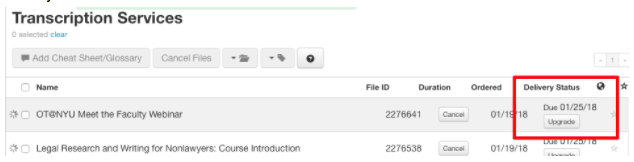
- You will then be brought back to a list view of all videos, where you can see the estimated delivery date. In most cases we are not authorized to “Upgrade” to a faster delivery date
Once videos are captioned, they should automatically get caption files added to Youtube!
Unlisted/Private YouTube Videos
If you have unlisted/private videos that need to be captioned (those that do not appear in the program’s list of videos), you must complete via URL.
- Follow all of the check above regarding confirming a video needs captioning AND that we have access to the YouTube account.Note: In cases where we do NOT have access, we must at least be able to send the caption files to someone who does (e.g. brand would delivery to the school with instructions on adding the caption file)
- Go to the 3PlayMedia site. In the top left menu, click on the “Upload Media” button.
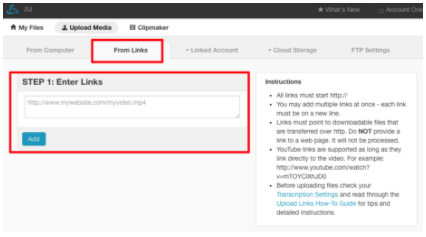
- Click on the “From Links” tab, then enter the full URL of all YouTube videos and click “Add”, then “Upload”.
- In the pop-up, confirm upload – please see steps 6-10 above.
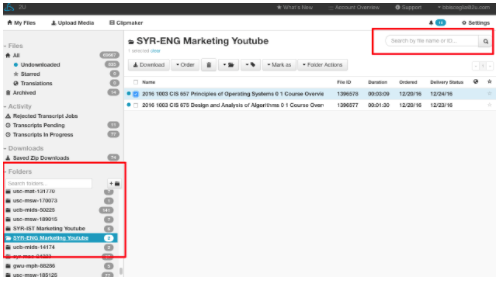
- Once the captions have been completed, return to the 3PlayMedia site and go to “My Files” Recently captioned videos should appear at the top of the list, but you can also search by ID, or navigate to your program’s folder in the left sidebar.
- Find the file you need to add a caption for, and check the box next to the filename.
- Click “Download”. You will be brought to the download options page. Please choose SCC under the “SMPTE Caption Formats”. (.scc file extension files are YouTube’s preferred file format)

- Access the admin of the program’s youtube account, navigate to the video’s settings, and follow these instructions from YouTube on adding captions.
- After submission, follow the steps at the beginning of this doc to confirm your captions are now showing as “English – CC (English)” on the video page.
Requesting an Audio Description
How do I know if I need an Audio Description?
If your video contains important information that is communicated only visually—to the point at which a non-sighted user would fail to benefit from the video’s intention—then you need to request an Audio Description for the video.
Luckily, 3Play provides excellent Audio Description services, and requesting them is integrated into the Caption request process. It’s simply an add-on service!
See the video below, which has been embedded within 3Play’s Audio Description iFrame plugin. If you toggle on the ‘AD’ button you’ll hear the audio description describing the contents of the video which would otherwise be impossible to perceive non-visually.
How do I request an Audio Description?
To request an Audio Description, you follow the same instructions listed on this page for requesting captioning services for your video, except during that process, you’ll find this menu:
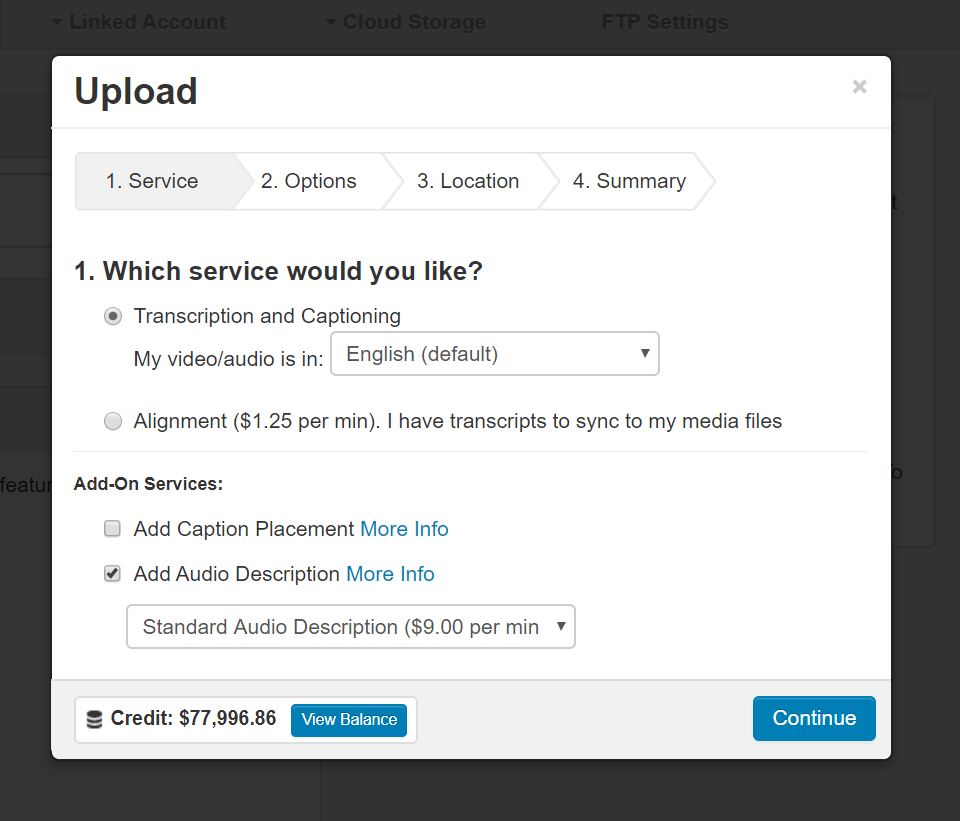
In order to add the Audio Description service to your caption request, you’ll need to check the “Add Audio Desription” option on that menu. It’s impossible to request an Audio Description without first requsting captioning.
After that, proceed through the next few steps by accepting the default options until you get to this window:
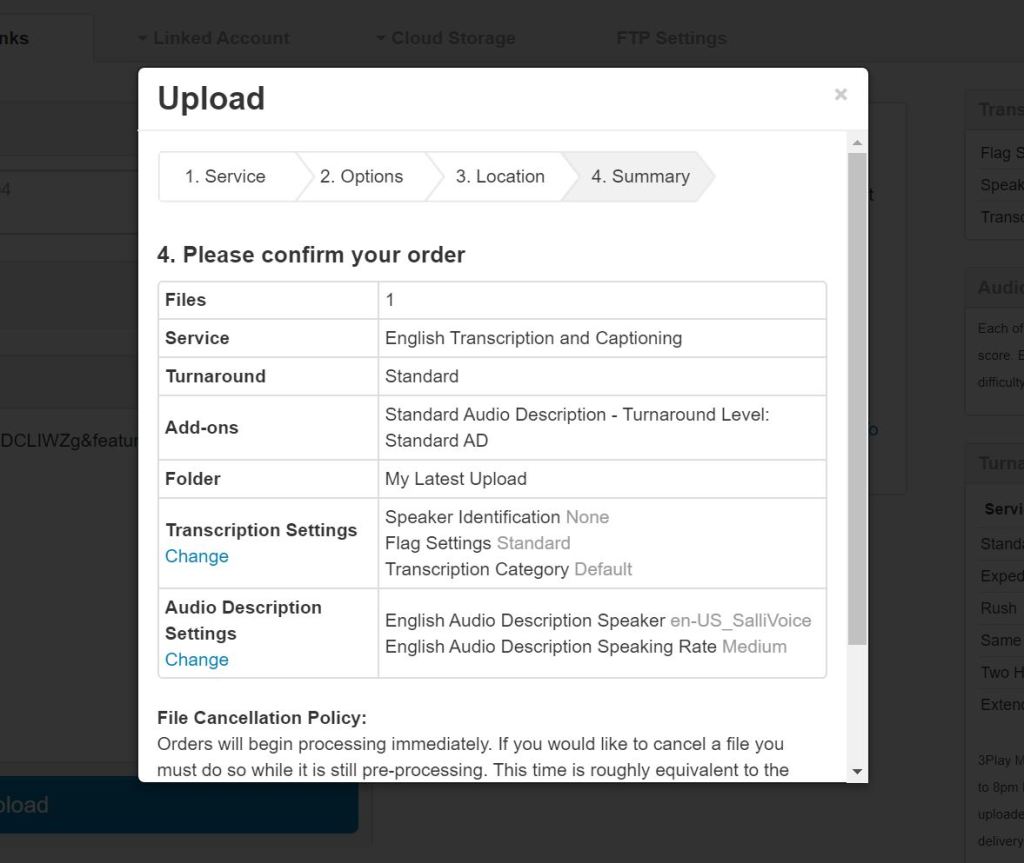
While there, confirm that the “Audio Description Settings” indicate that the “Speaker” is en-US_SalliVoice and the “Speaking Rate” is Medium. This will ensure that the Audio Description is read at the correct speed and with the correct voice.
Be sure your Audio Description settings are correct, and take note of the 3Play folder that the completed files will be deposited into. You’ll need to remember where to look for your files when they return – and there are hundreds of folders to look through – so be sure to take note of the folder you’ve selected. Once you’re sure, proceed to place your order. This costs money, so seriously, no messing around.
I placed my Audio Description order, now what?
3Play will take a few days to deliver the completed files to you, and you may not be notified when they do, so you’ll need to check back on the status of your order. The files will be delivered to the folder you selected when making the request.
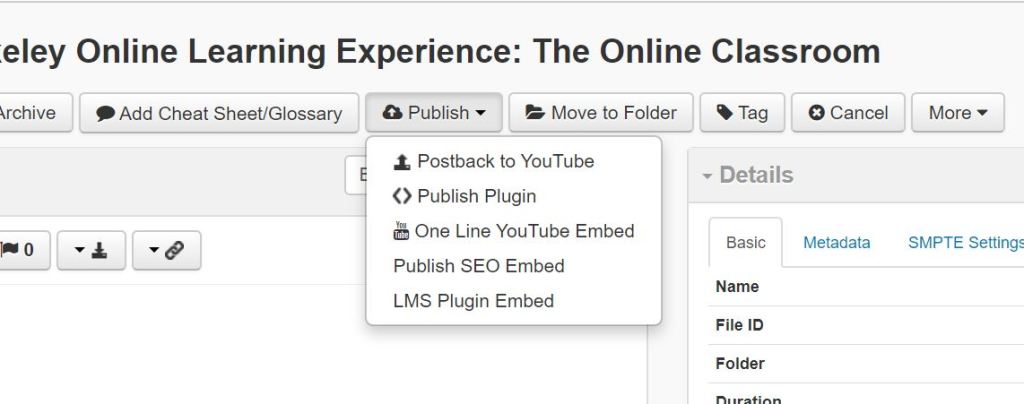
Once your order is complete, you may “Publish” them by clicking on the “Publish” dropdown seen below and selecting “<> Publish Plugin”.
You will need to grab 2 separate iFrame plugins from 3Play. These iFrames aren’t responsive, so the best way to embed them on our sites is by grabbing one for desktop, one for mobile, and hide/showing them at their respective screen sizes.
To do this, you’ll need to click the “Style Settings” dropdown on the Publish window to reveal “Width” and “Height” options.
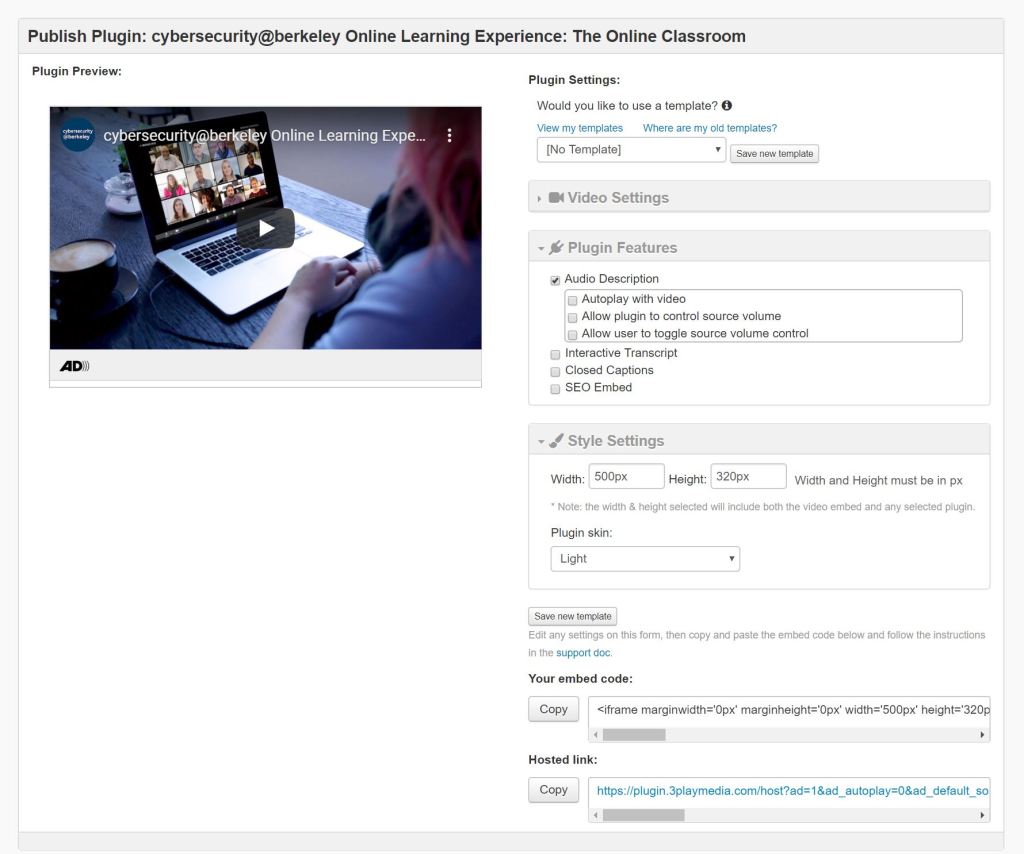
Our recommended sizes are
- 700px wide by 450px tall for desktop, and
- 310px wide by 230px tall for mobile
Place your iFrames inside this snippet to ensure they are optimized for all screens.
There is a space in the code snippet (linked above) for both of your iFrames, and the accompanying CSS is already applied. Feel free to modify the code or iFrame sizes to suit your needs, but keep in mind that iFrames are like little windows to another webpage, so they’re a little tricky to modify.
Alright, that’s pretty much it. Enjoy!